Tuesday 30 August 2016

Sports Photography at CMU

Earlier this summer I posted an article about cityscape and architecture photography in the City of Pittsburgh, Pennsylvania. I am extremely grateful for the positive response that article received; thank you! Many photographers specialize in one genre, but urban environments make up less than half of my subjects. Sports photography is my other passion, and it is what inspired me to begin my journey as a photographer.

golf

NIKON D750 @ 200mm, ISO 100, 1/1250, f/3.2

From the age of eleven I have been a competitive swimmer. I was recruited by Carnegie Mellon University to be a member of their swim team, and I swam for the entirety of my time in college. I got my first digital camera (not counting my iPhone) during my third year at CMU because I wanted to photograph my teammates competing. I enjoyed swimming photography so much that I joined CMU’s sports information staff at the beginning of my senior year. As an “official” photographer I was granted access to all home athletic events.

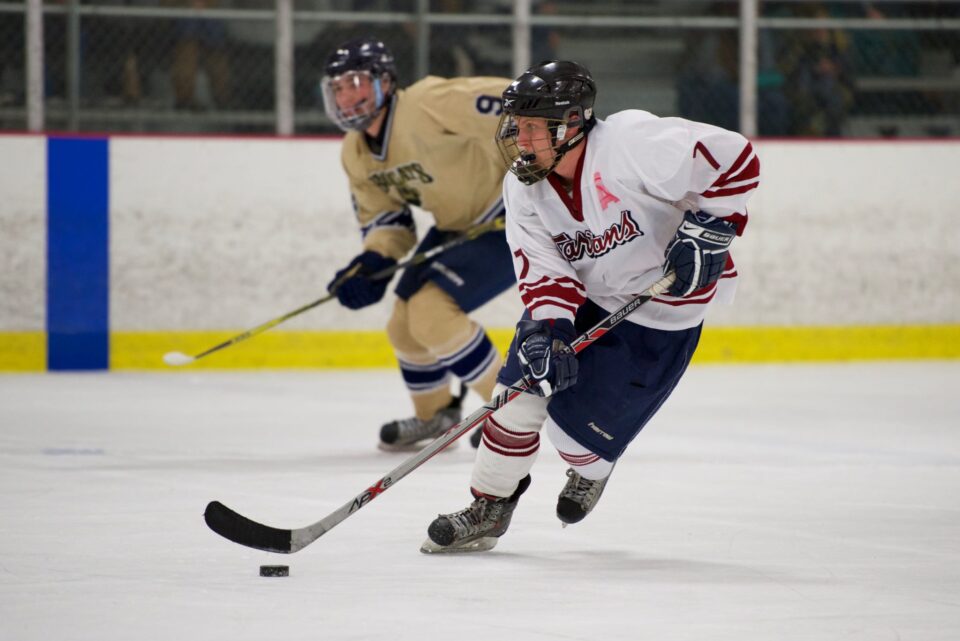
hockey

NIKON D750 @ 200mm, ISO 2000, 1/1000, f/2.8

The vast majority of my sports images were taken with a Nikon D750 (PL review) body and a Nikon 70-200mm f/2.8G VR II (PL review) lens. 200mm on full frame is the bare minimum you need to photograph sports, and in many cases it is too short. In this article I will discuss the five main sports I photographed: soccer, football, swimming, basketball, and track & field.

lacrosse

NIKON D810 @ 24mm, ISO 200, 1/320, f/4.0

In the interest of length I will not be explaining the rules of each sport; rather, I will highlight key aspects of a sport that impact how it is photographed. Additionally, I will assume that the reader already possesses knowledge on how to freeze action by using an appropriately fast shutter speed (generally between 1/500 and 1/2000 of a second).

Soccer

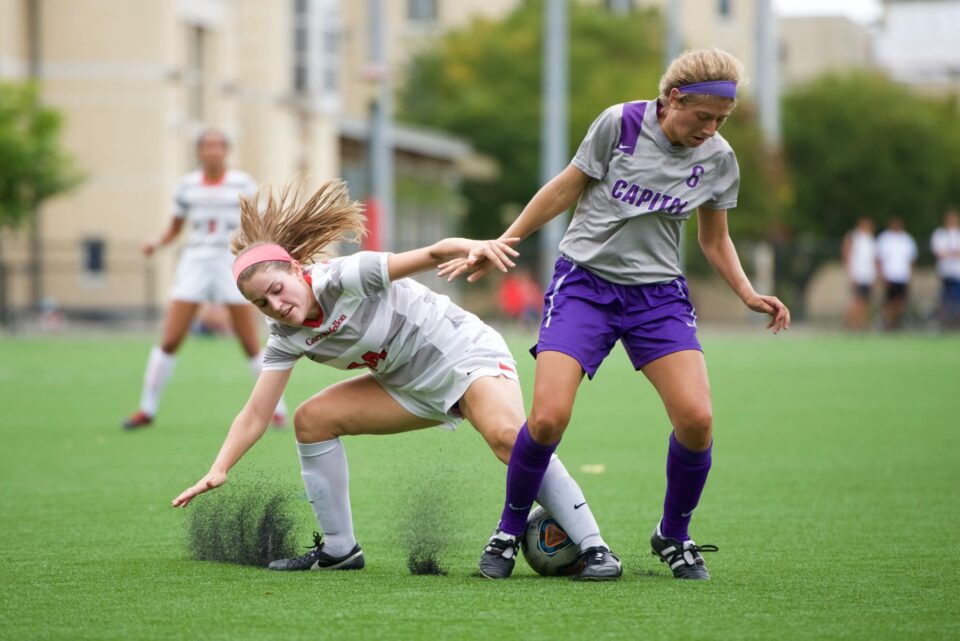
Soccer is the most popular sport in the world, but many Americans do not know this because they focus most of their energy on football, baseball, and basketball. Despite its relative lack of popularity in the USA I enjoyed photographing soccer more than the three sports I mentioned above. The game has a rhythm that is more predictable than most ball-oriented sports, making it easy to find good shooting positions on the sidelines. Patience and strategy are the keys to successfully photographing this field sport.

soccer0

NIKON D750 @ 200mm, ISO 320, 1/1600, f/2.8

A college soccer field is roughly 120 yards long and 80 yards wide, larger than an American football field! Photographing players in an area measuring 9600 square yards is a challenge with even the longest lens, let alone a relatively short 200mm. When dealing with a field of this size it is critical to realize that you will not get a shot of every piece of action that occurs during the game. Luckily, at 90 minutes of regulation playing time there is plenty of opportunity to capture exciting moments.

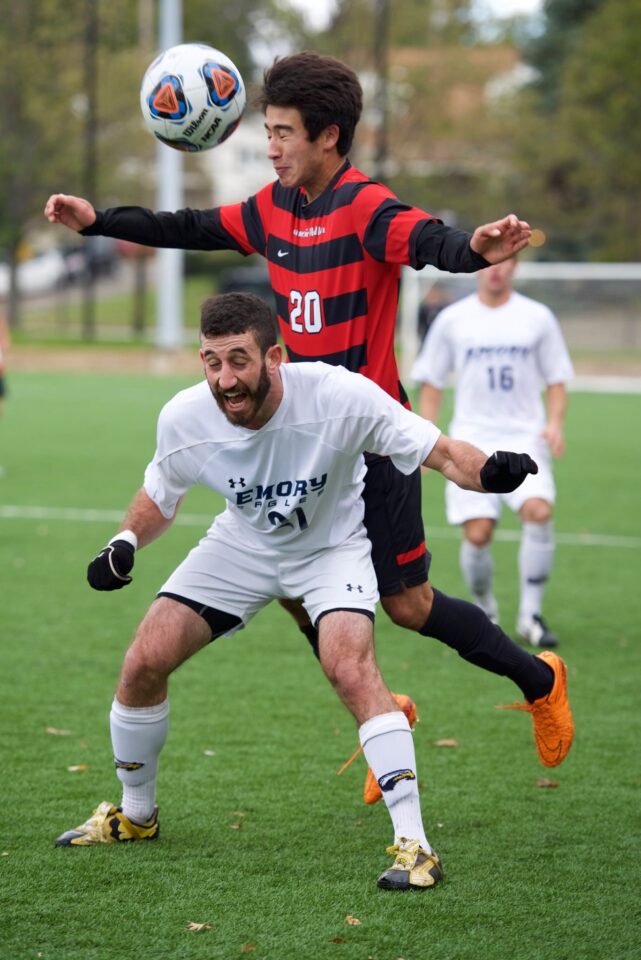
soccer1

NIKON D750 @ 200mm, ISO 400, 1/1600, f/2.8

The key to walking away from a soccer match with a solid batch of images is to position yourself effectively on the sidelines. I photographed sports at a NCAA Division III school, meaning that I could go virtually anywhere on the sidelines. Many photographers will not be afforded this luxury, but the principles of finding a good shooting position do not change.

soccer2

NIKON D750 @ 200mm, ISO 400, 1/1600, f/2.8

The most important thing to consider when choosing where to shoot from is the lighting. You want to shoot with your back to the sun such that players’ faces are illuminated. If this is impossible, then you can expose for the faces, but your backgrounds may be overexposed. Next you should consider which side of the field your team is attacking. You are most likely to get head-on shots of your players if you are on the opponent’s side of the field. The last component to look at is the flow of the game. Is your team playing more defensively or offensively? Where is most of the action taking place? Which team has the momentum? These questions can help guide you to an optimal location. Sitting dead center of the sidelines is often not the best approach.

soccer3

NIKON D750 @ 135mm, ISO 900, 1/1600, f/3.2

Football

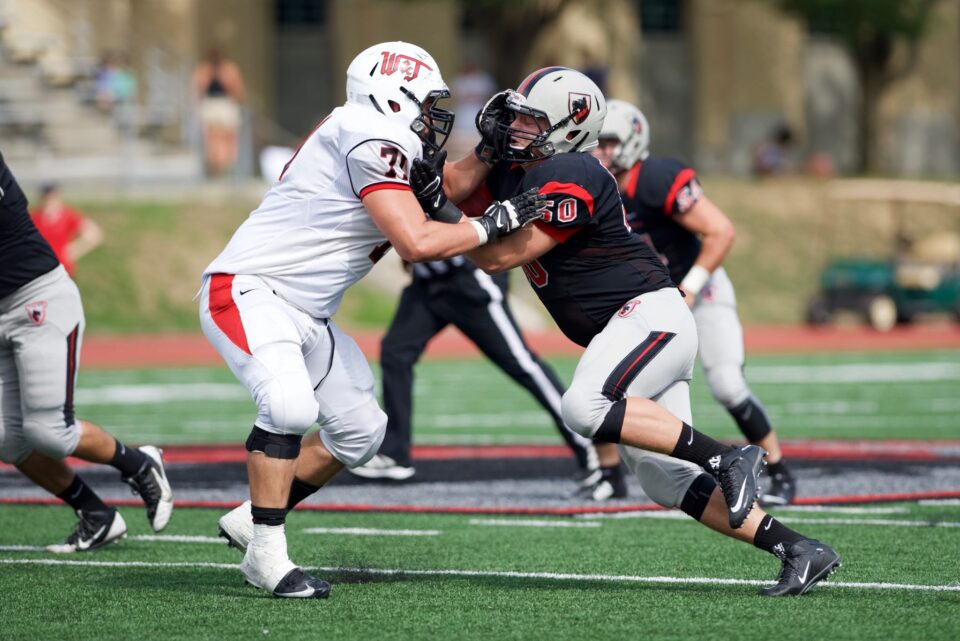
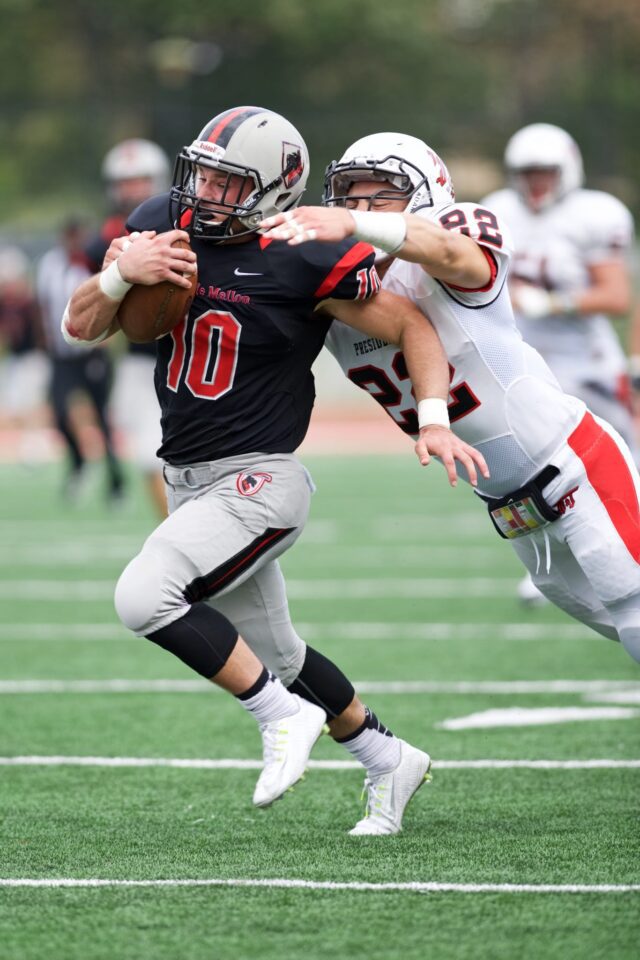
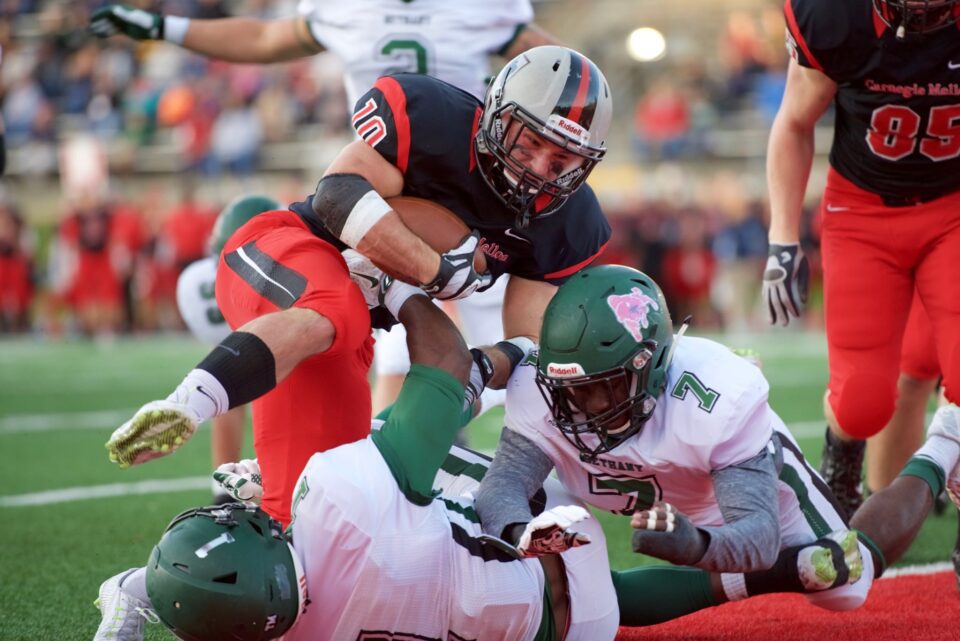
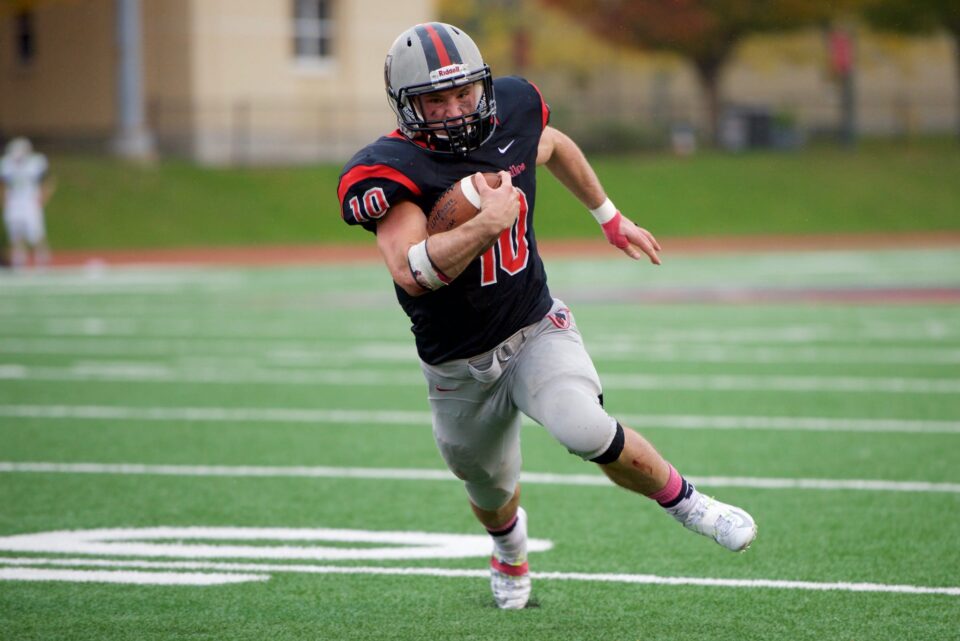
I think it is fair to say that gridiron football is the most popular sport in the USA. Football is played on a field that is roughly 120 yards long and 53 yards wide, narrower than a soccer field. For this reason you might believe that football is easier to photograph than soccer, but you would be incorrect. During a football game the majority of the action takes place in the center of the field. Additionally, the game is conducted through a series of quick plays which are intentionally unpredictable. As such, intuition and a long lens are great assets when photographing this sport.

football0

NIKON D750 @ 300mm, ISO 180, 1/1600, f/3.5

College football games are 60 minutes long, broken into four 15-minute quarters. Despite relatively short playing time, football games generally last about three hours due to time taken between plays, time outs, and rest between quarters. As such, as a photographer you will be doing a lot of waiting. During idle time it is best to focus on preparing yourself for the next play by repositioning yourself on the sidelines, if possible, and attempting to predict what the next play could be. As someone new to shooting football I often followed the veterans’ movements in an attempt to increase my own experience.

football1

NIKON D750 @ 300mm, ISO 320, 1/1600, f/3.5

Football is difficult to shoot without a 300mm lens (on full frame) or longer because, unlike with soccer, you cannot simply wait for action to come to you. Most pros use a 400mm f/2.8, and for a good reason: action starts in the center of the field and moves unpredictably from there. If you are like me, limited to 200mm, then you must wait and hope for the best. Even those easy shots of the quarterback throwing are mostly out of reach.

football2

NIKON D750 @ 200mm, ISO 640, 1/1000, f/2.8

On one occasion I rented a Nikon 300mm f/2.8G VR II lens. This lens proved to be incredibly helpful, and I missed it at all of the football games I attended without it. On the other hand, the 300mm felt unbalanced on my small D750 body. A lens of this size is probably best suited for a larger pro-level body.

football3

NIKON D750 @ 200mm, ISO 1600, 1/1000, f/2.8

Swimming

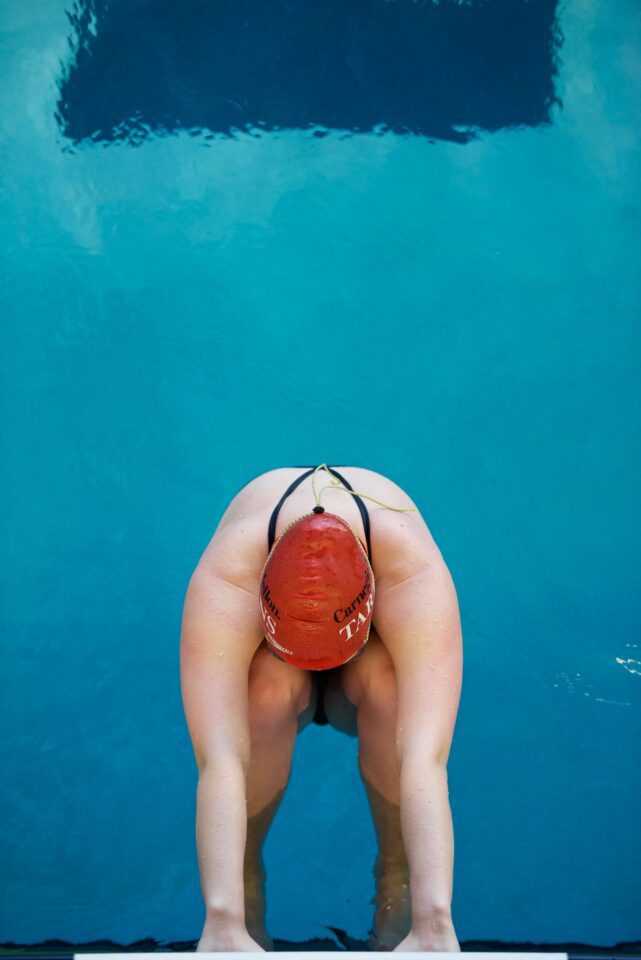
While growing up and through college I dedicated a large portion of my life to swimming; for this reason it is my favorite sport to photograph. Swimming is not particularly glamorous, and it often takes place indoors. As such, it is uncommon to see quality images of swimmers at or below the college level. The opportunity to create inspiring images of my teammates led me to get my first digital camera. As silly as it may sound, my goal was to make my teammates look like professional athletes.

swim0

NIKON D750 @ 200mm, ISO 1600, 1/1000, f/2.8

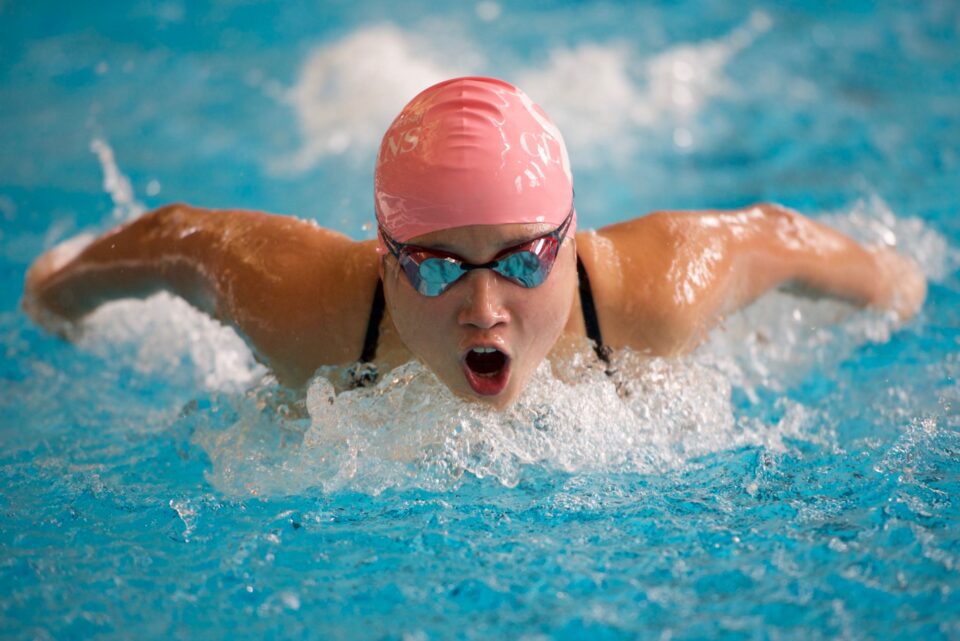
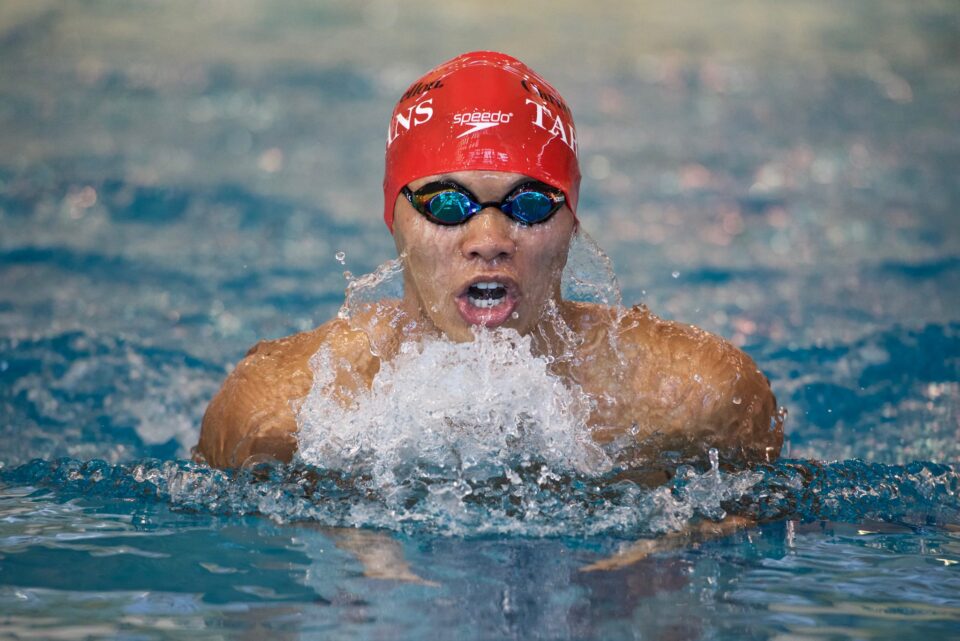
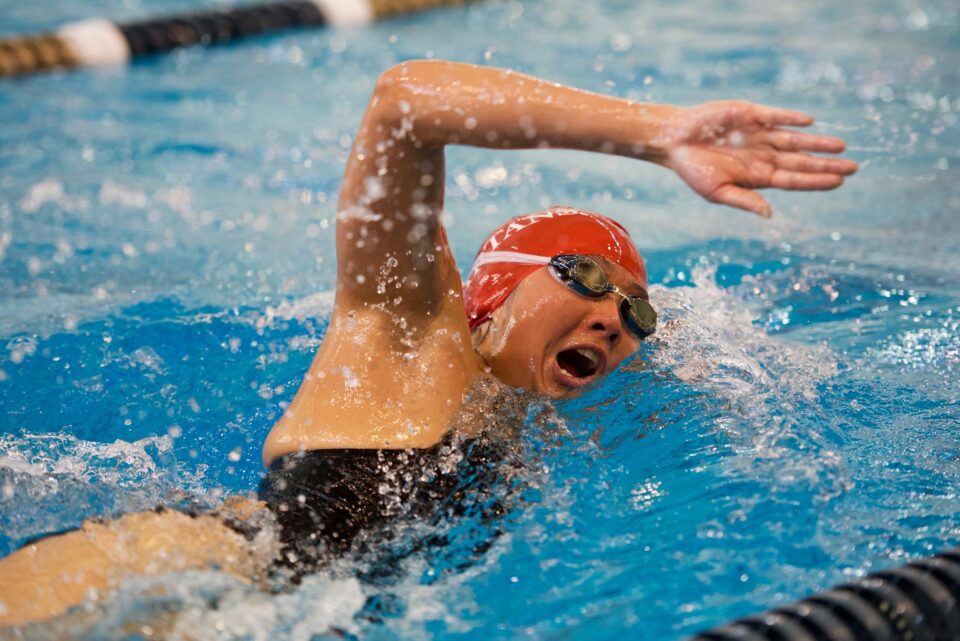
Like most races, swimming is a time-based sport. Naturally, excellent timing is the most important skill to possess when photographing swimming. The majority of a swimmer’s race is spent with their face in the water, but faces are crucial to a successful image, so the photographer must carefully time their shots to intersect with the swimmer’s breathing. In backstroke this is not an issue. In breaststroke the swimmer breaths ever stroke (this is a rule). In butterfly most swimmers breath every other stroke, but this can vary quite a bit. In freestyle the breathing pattern depends on the swimmer and the race. Learning your subject’s breathing pattern is critical.

swim1

NIKON D750 @ 200mm, ISO 3200, 1/1000, f/3.2

As mentioned earlier, college swimming usually takes place indoors because it is a winter sport. Indoor sports require a fast lens and a body that can shoot at 1600 ISO or greater while maintaining good image quality. Most of my swimming images are taken close to 1/1000s, f/2.8, 3200 ISO, but this can vary a lot depending on the pool. Swimmers do not move super quickly in the water, so a shutter speed of around 1/500s is sufficient to get a sharp face, but water droplets and arms may blur at this speed, making 1/1000s optimal.

swim2

NIKON D750 @ 135mm, ISO 2500, 1/1000, f/2.8

Unlike field sports, swimming is generally easy to photograph with 200mm lens. Swimmers move up and down their lanes predictably, so all you need to do is track them with continuous autofocus while waiting for their upper body to fill the frame. Short-axis strokes (breast and fly) are best shot head-on or at a slight angle. Long-axis strokes (free and back) are best photographed from the side. If you are shooting a large meet or at an Olympic-sized (50 meters long) pool, then a longer lens may be useful.

swim3

NIKON D750 @ 135mm, ISO 3200, 1/1000, f/2.8

Basketball

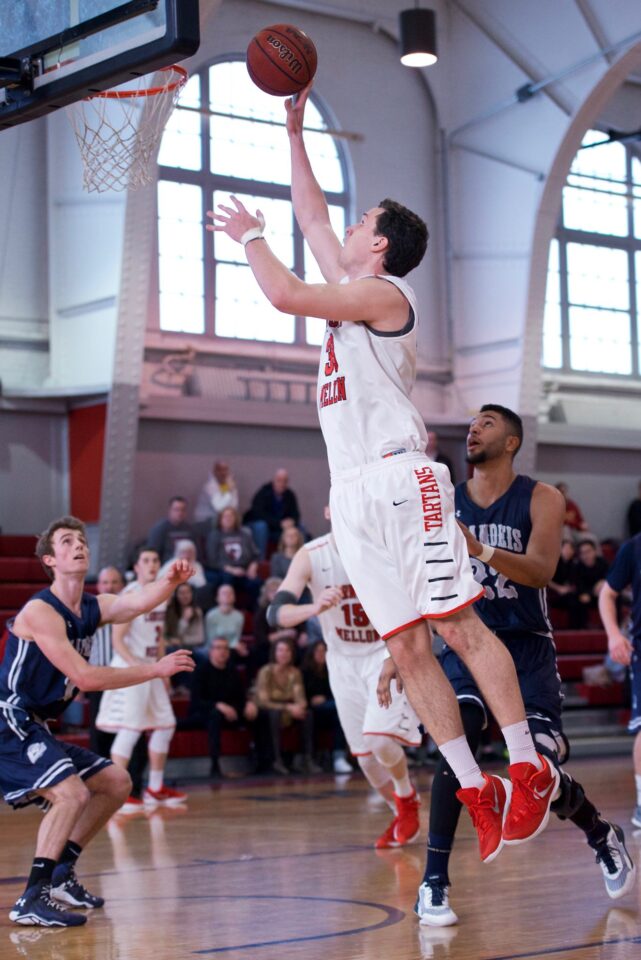
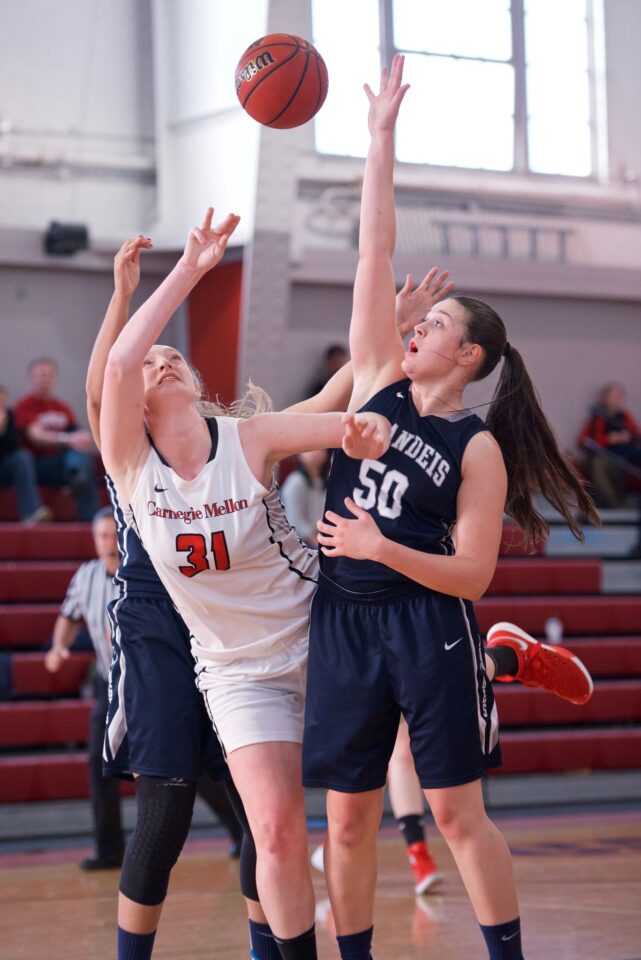
Of all the sports I have photographed I feel that basketball is the trickiest. A college basketball court is only 94 feet long and 50 feet wide; this initially led me to believe that shooting basketball would be easy compared to field sports where a long lens is necessary. While it is true that basketball photography does not necessitate a long lens, this does not make shooting it any easier. Players move quickly and unpredictably on the court. They are constantly passing the ball and blocking other players. Good hand-eye coordination and a fast autofocus system are your best bet for achieving success with basketball.

basketball0

NIKON D750 @ 70mm, ISO 4000, 1/1000, f/2.8

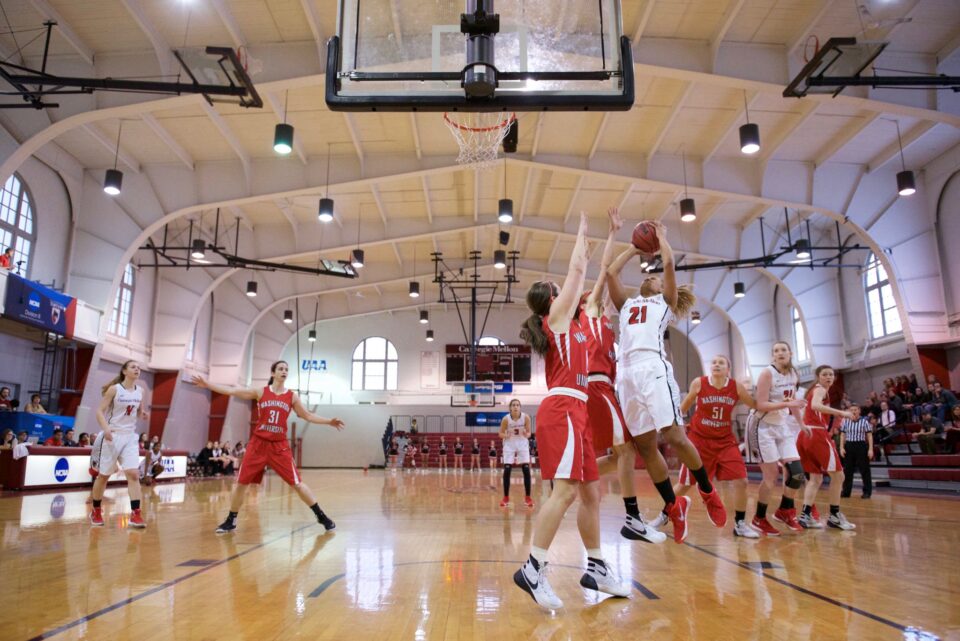
Like swimming, basketball is played indoors in the winter. Indoor sports present a challenge for even the best image sensors and autofocus systems. Newer facilities tend to have better lighting, but the facility I shot at was built in 1924, and the lighting was less than ideal. Some lights were different colors than others, making accurate white balance nearly impossible. I used a device called ExpoDisc to help set white balance manually, but even so I generally had to make corrections in post-production. Luckily, the gym had big windows that helped tremendously during daytime games.

basketball1

NIKON D750 @ 135mm, ISO 4000, 1/1000, f/2.8

Lighting challenges were just one of my frustrations when it came to basketball; grabbing accurate focus proved to be exceedingly difficult even with the D750’s superb autofocus system. The players moved so quickly and erratically that tracking them was a big challenge. To make matters worse, players constantly block and cross over each other which confuses the camera. Ultimately, my solution was to improve my hand-eye coordination through practice. Over time I got better at predicting players’ movements and tracking them accordingly. Landing focus on high-contrast areas, like numbered jerseys, and using dynamic autofocus helped a lot, too.

basketball2

NIKON D750 @ 110mm, ISO 3200, 1/1000, f/2.8

When shooting basketball you will most likely be positioned on the right side of the basket near the baseline. This location is generally designated for media, and it is a good place to get shots of players going for a basket. Some of the best action shots in basketball are of players driving for the goal or performing a layup or even doing a slam dunk; this is where tracking becomes tough. In terms of lenses, I typically used a 24-70mm f/2.8 and a 70-200mm f/2.8, but I have seen photographers use fisheyes, 85mm, and 300mm lens.

basketball3

NIKON D750 @ 24mm, ISO 6400, 1/800, f/2.8

Track & Field

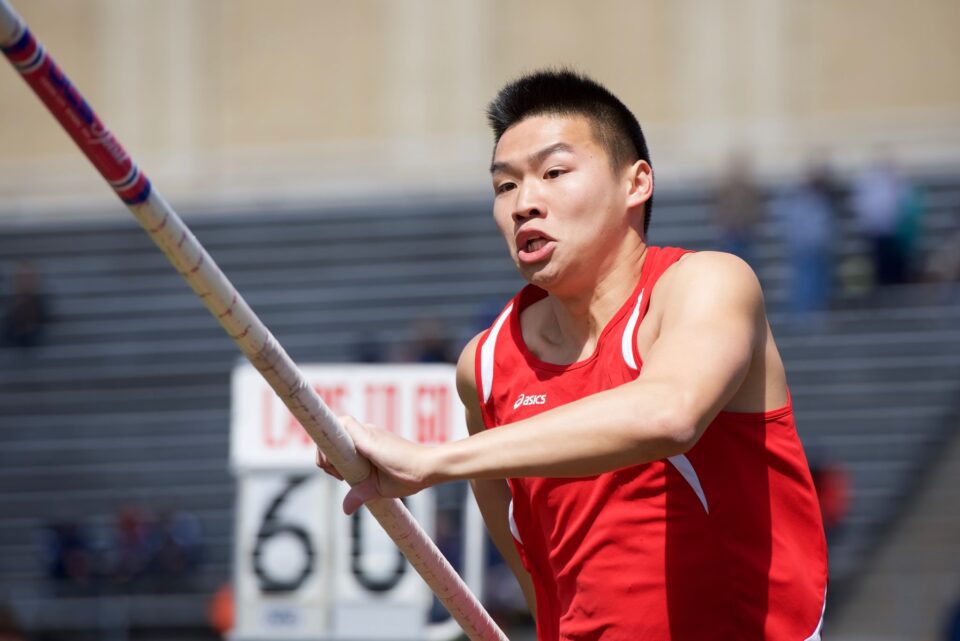
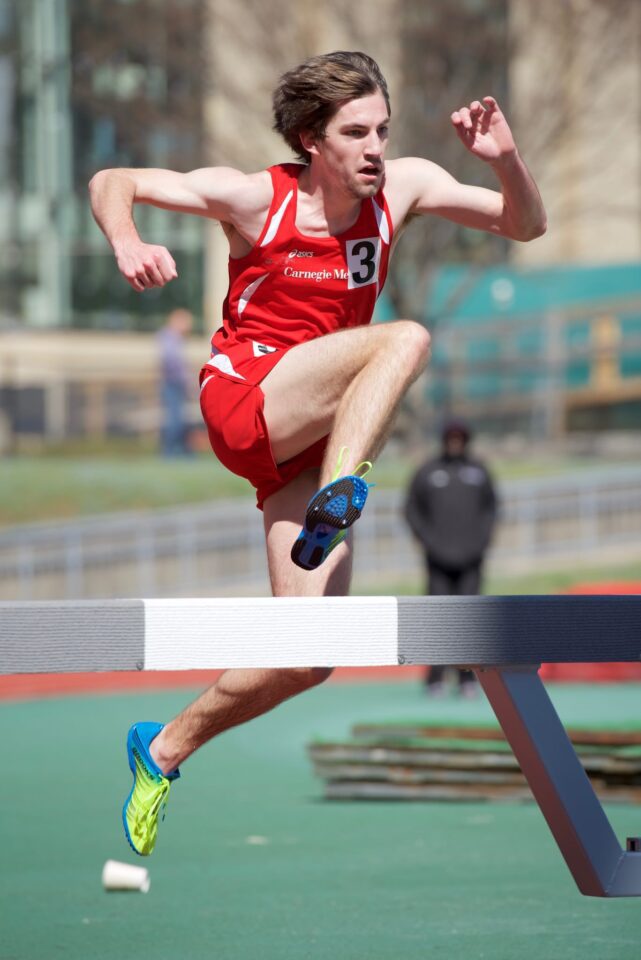
Track & field is one of the most exciting sports to photograph because of the wide range of events that take place during a meet. Throwing, jumping, and running are the three categories of events, and each one is photographed differently. I found that it is possible to get good track & field images while limited to 200mm, but in many cases a longer lens would be helpful. Basically, the longer your lens, the more you can sit back and wait for the athletes to come to you without needing to get uncomfortably close to the action.

tf0

NIKON D750 @ 135mm, ISO 200, 1/2500, f/4.0

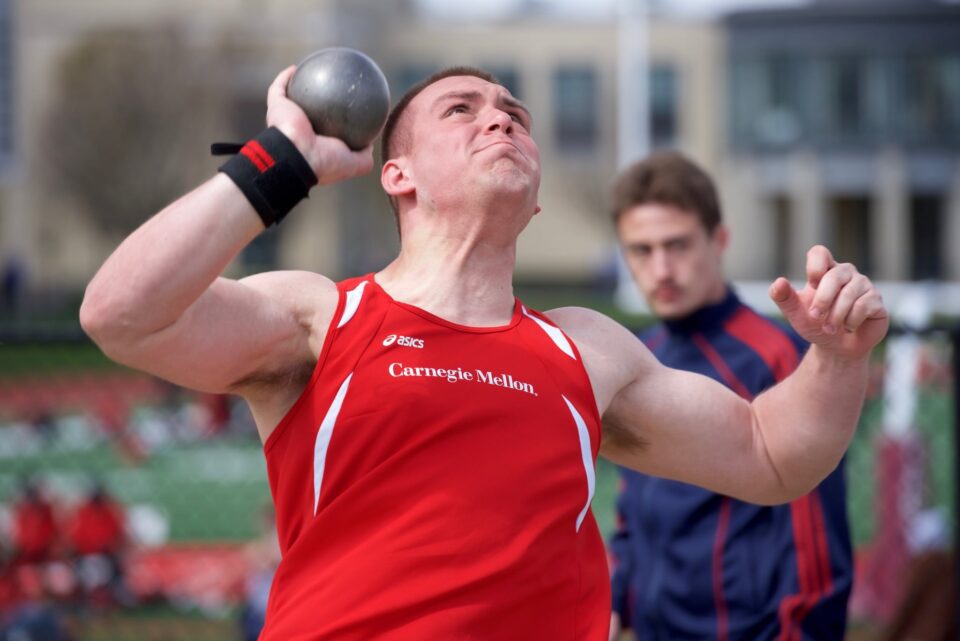
Throwing events, such as shot put and discus, are a display of strength and technique. Generally, I try to get a close up shot of the athlete’s upper body as they attempt to hurl the object as far as possible. Intense facial expressions are important here. Some of these events take place within a cage or net for safety reasons. In this case your best bet is a long lens or you can try getting very close to the cage while using a small f-stop (large aperture) such that it becomes completely blurred out.

tf1

NIKON D750 @ 200mm, ISO 250, 1/1600, f/4.0

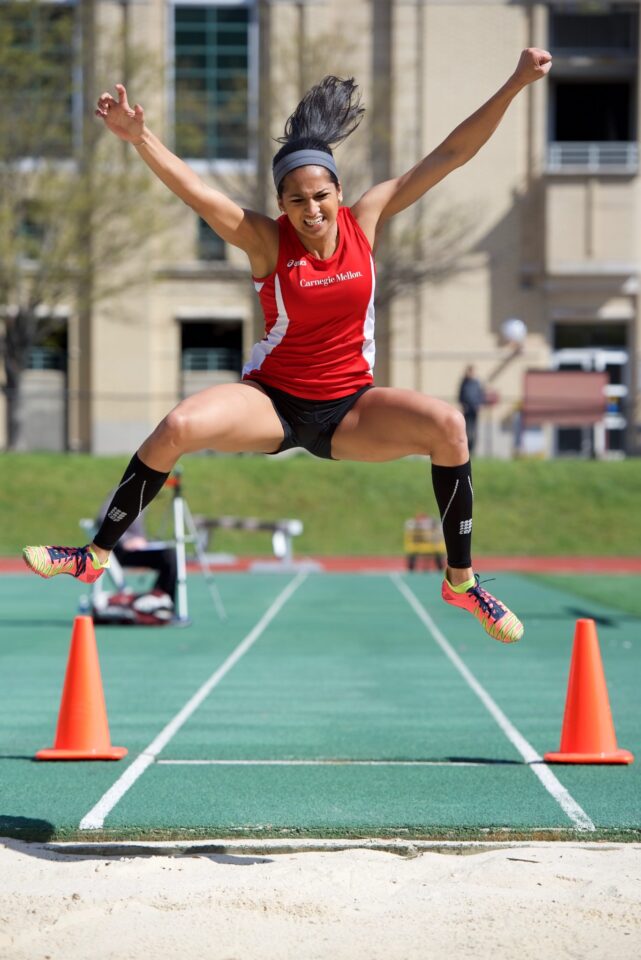
Jumping events are great fun to photograph; few images are more compelling than an athlete flying through the air. There are two focusing techniques you can use here. The first is tracking which works for long jump and triple jump where the athlete lands in a sand pit. Track the jumper as they run towards the pit and shoot off a burst of shots as they leap into the air and land in a flurry of sand. The second technique is prefocusing which works for high jump and pole vault where the jumper attempts to clear a bar, or standard. Prefocus on the bar while using a medium f-stop for increased depth of field and shoot off a burst as the jump is attempted.

tf2

NIKON D750 @ 200mm, ISO 110, 1/1600, f/4.0

In my experience, the best running shots come from good positioning around the track. First, keep your back to the sun. Second, look for places around the track where an exciting moment is likely to occur. Turns, hurdles, and the finish line are some of my favorites. I feel that the end of the race creates the most exciting images because runners are sweating and grimacing. A recent iconic image of Usain Bolt showed him smiling during a panning shot. Panning can work for running, but this requires a lot of practice.

tf3

NIKON D750 @ 200mm, ISO 200, 1/2000, f/3.5

What’s Next?

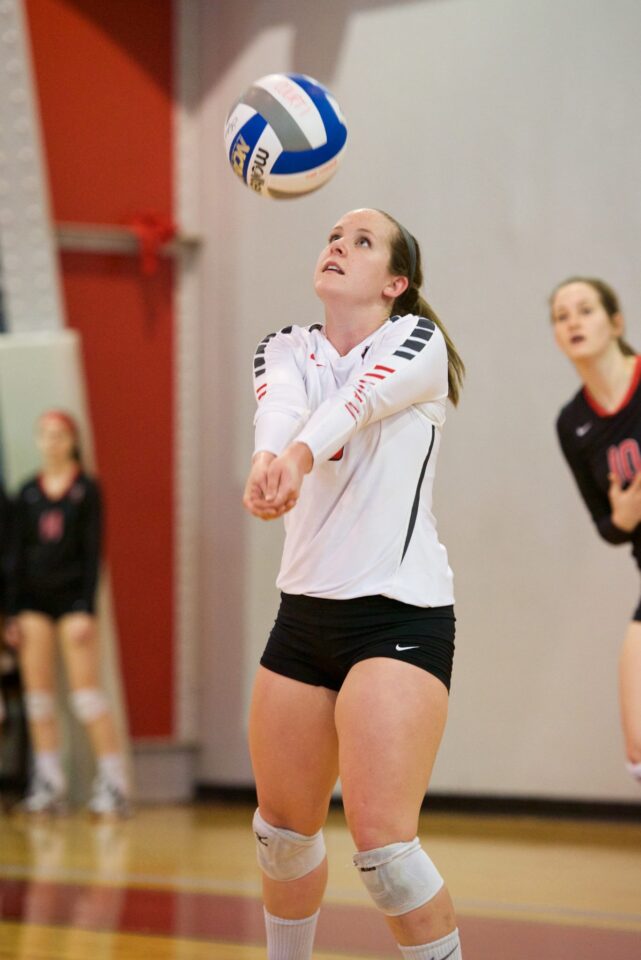
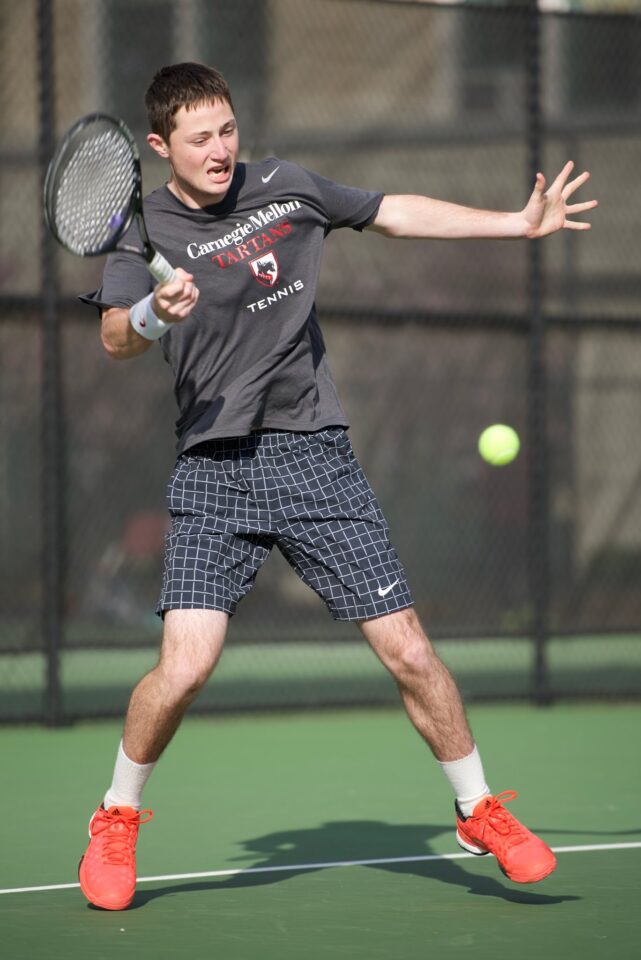
I love sports photography because it gets you closer to the action than any other spectator, and the excitement at this distance is addicting. On top of this, a good set of images allows you to relive the event forever. In this article I have provided my insight into photographing five collegiate sports. In addition to those five I have shot volleyball, tennis, golf, lacrosse, water polo, hockey, and baseball. I look forward to even more sports adventures in the future. You can see more of my sports photography at https://500px.com/mqnsports.

volleyball

NIKON D750 @ 135mm, ISO 6400, 1/800, f/2.8

tennis

NIKON D750 @ 200mm, ISO 160, 1/2000, f/2.8


This guest post was submitted by Matt Nielsen, a recent graduate of Carnegie Mellon University where he studied Information Systems and competed on the varsity swim team. Please visit his gallery at 500px to see more of his work.

The post Sports Photography at CMU appeared first on Photography Life.


from Photography Life https://photographylife.com/sports-photography-at-cmu

Aquarium Macro Photography of Ornamental Shrimp

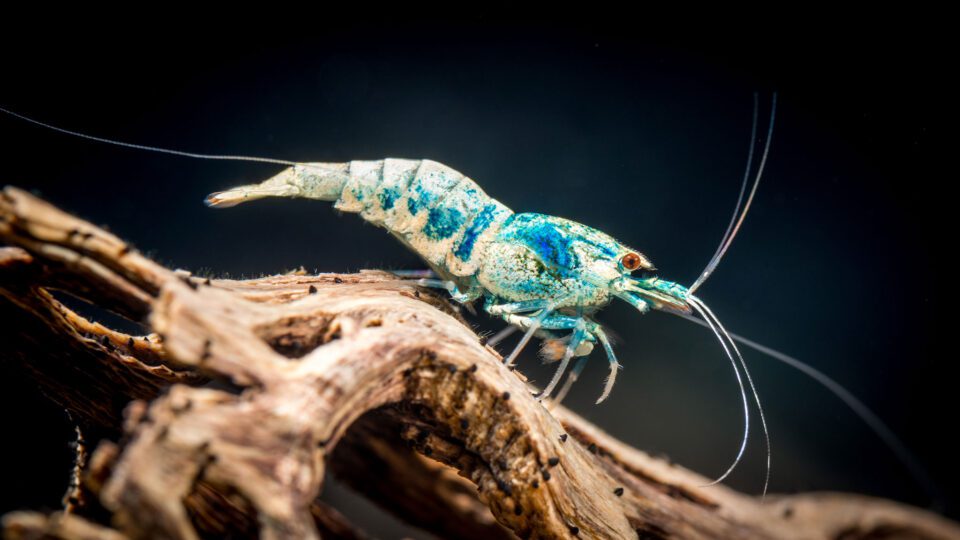
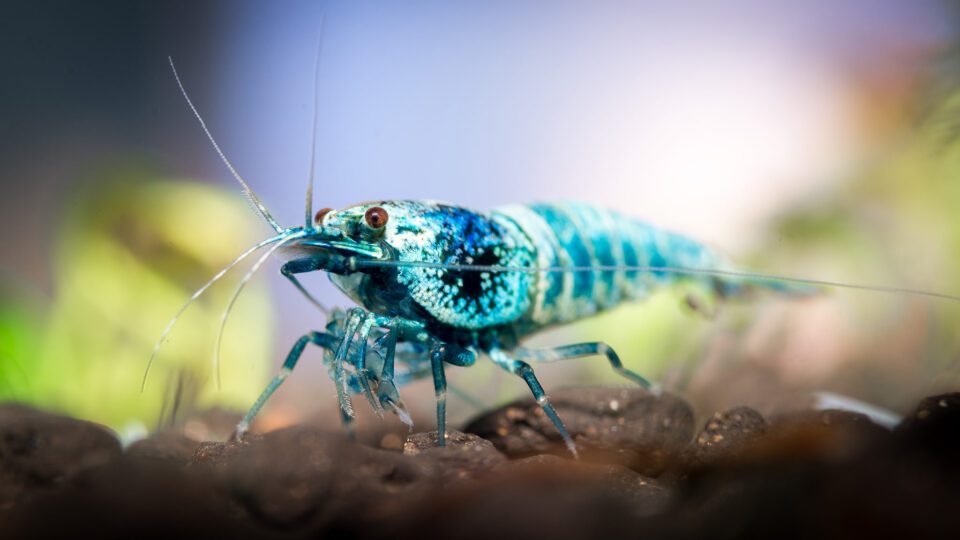
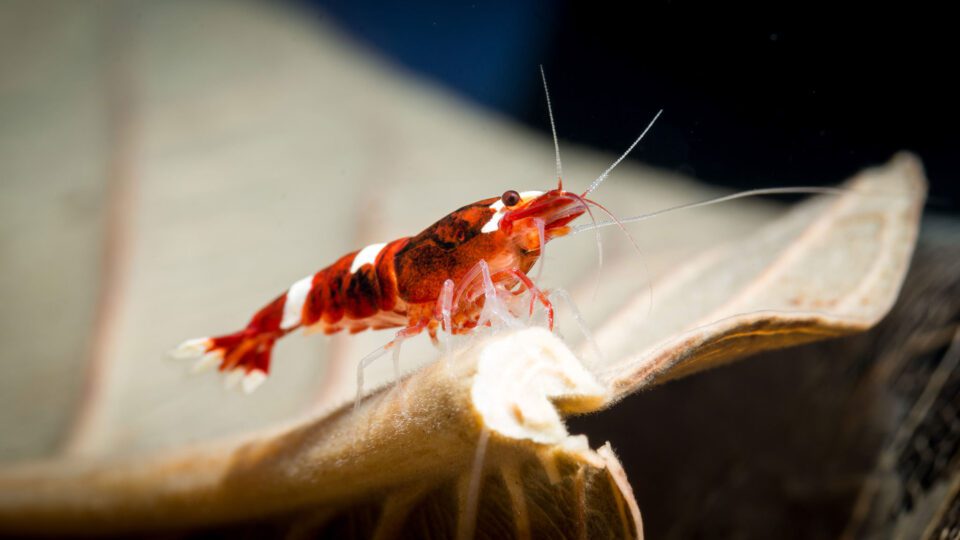
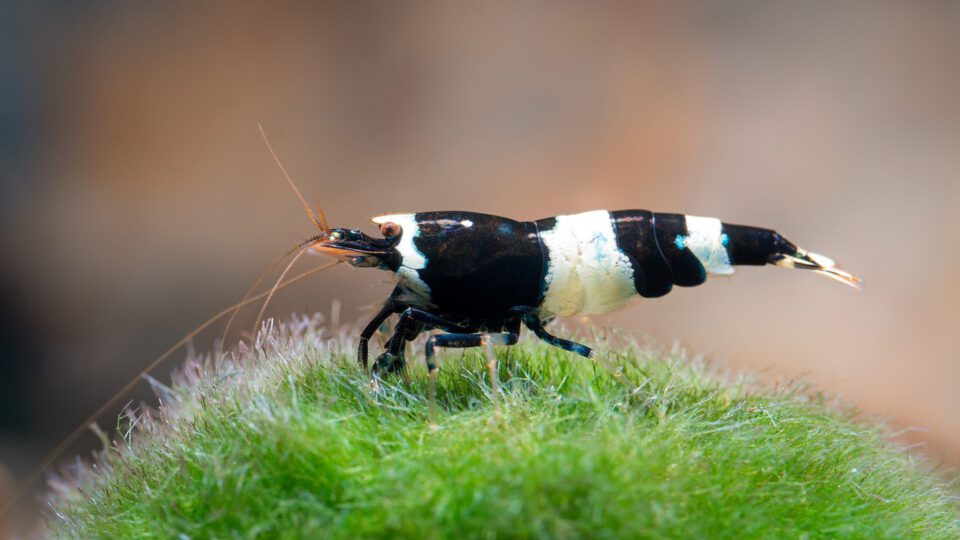
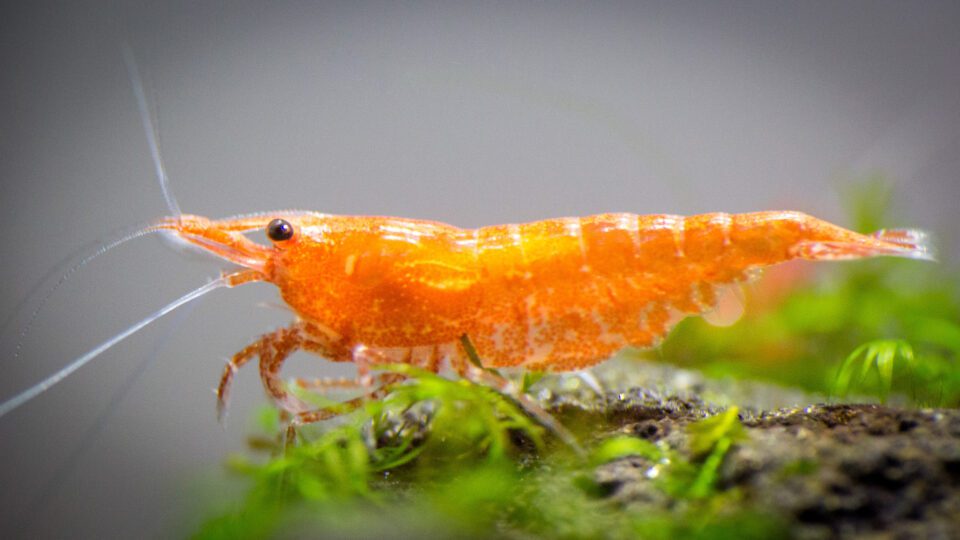
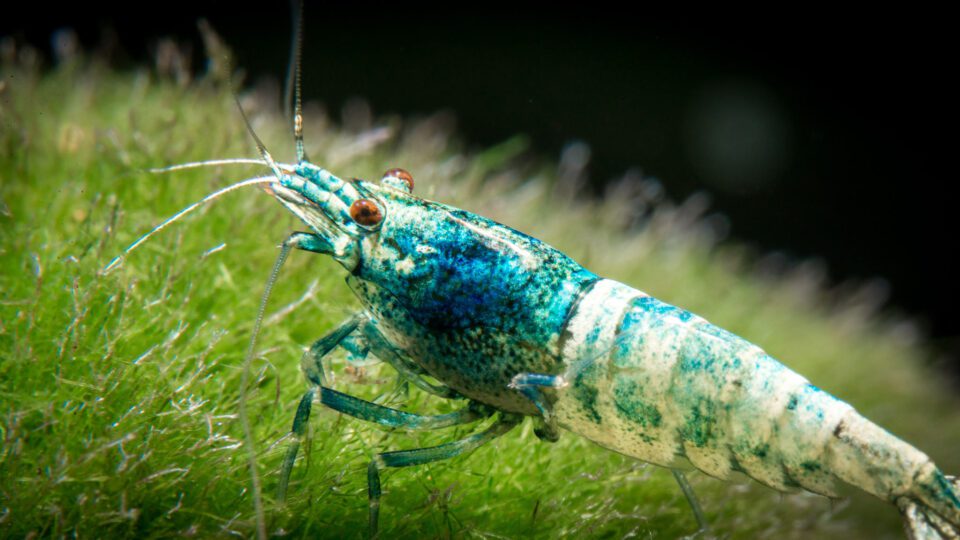
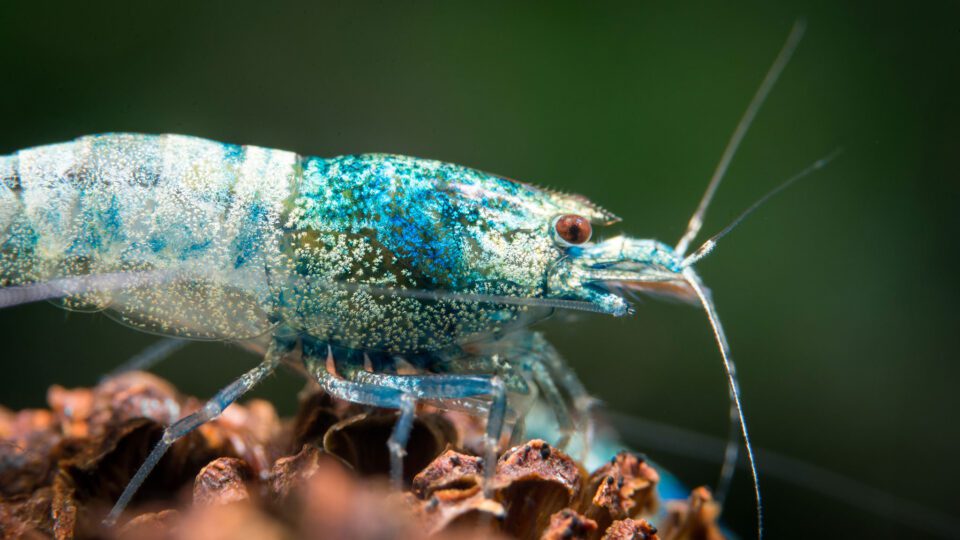
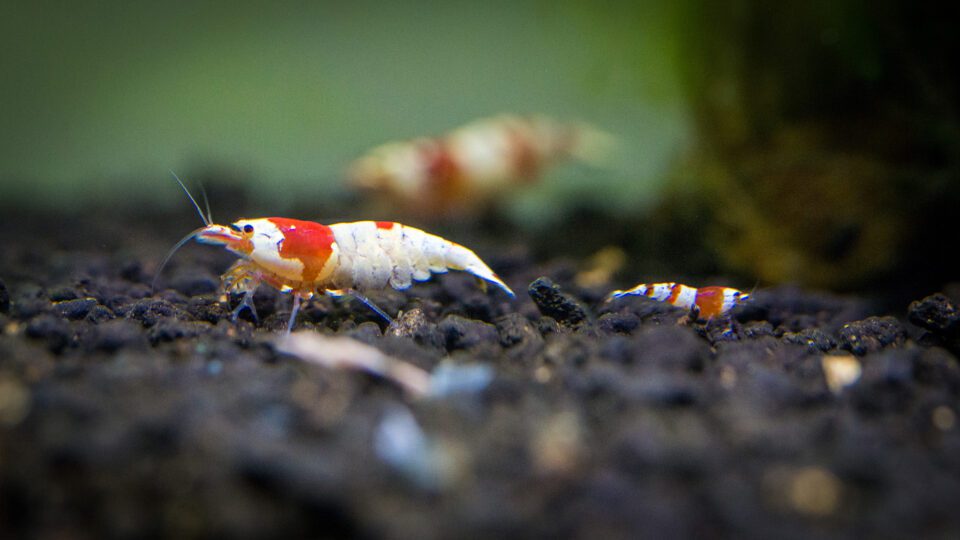
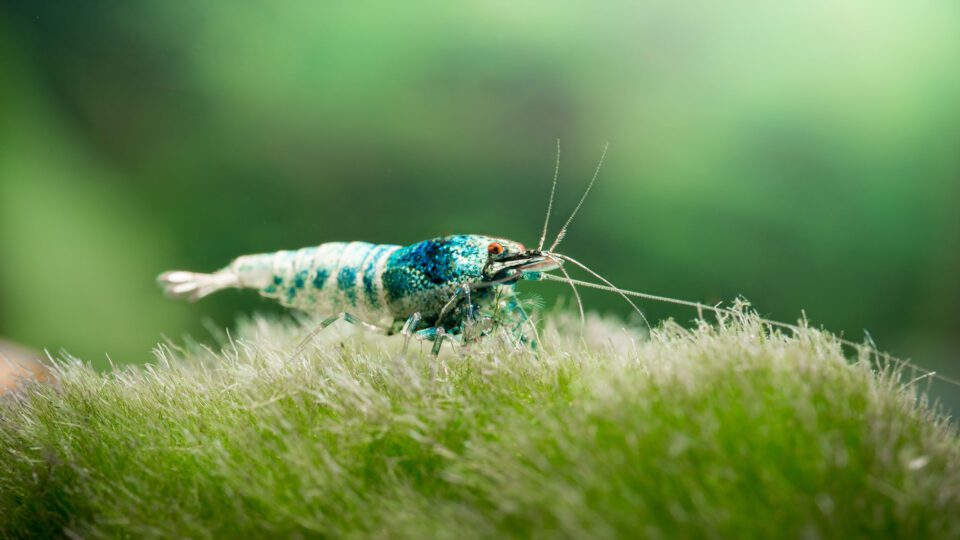
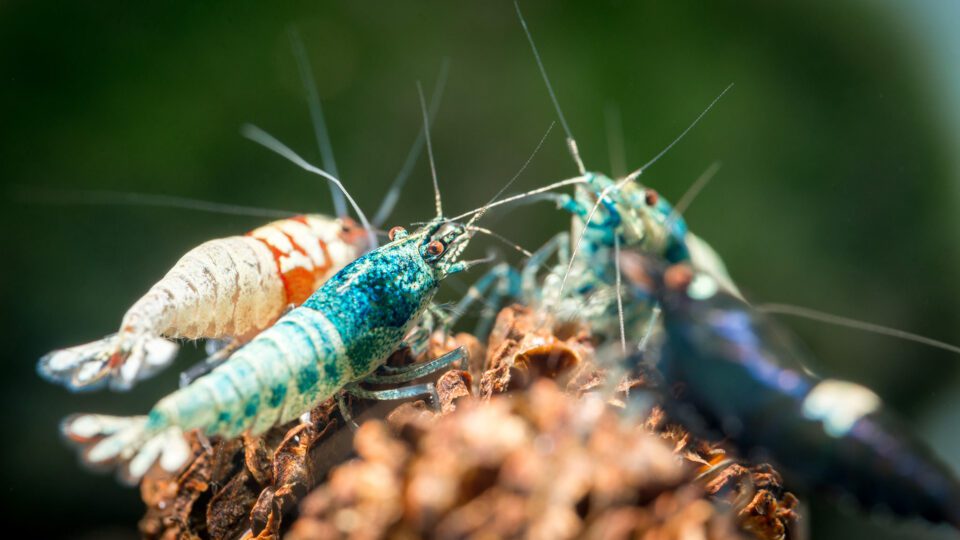
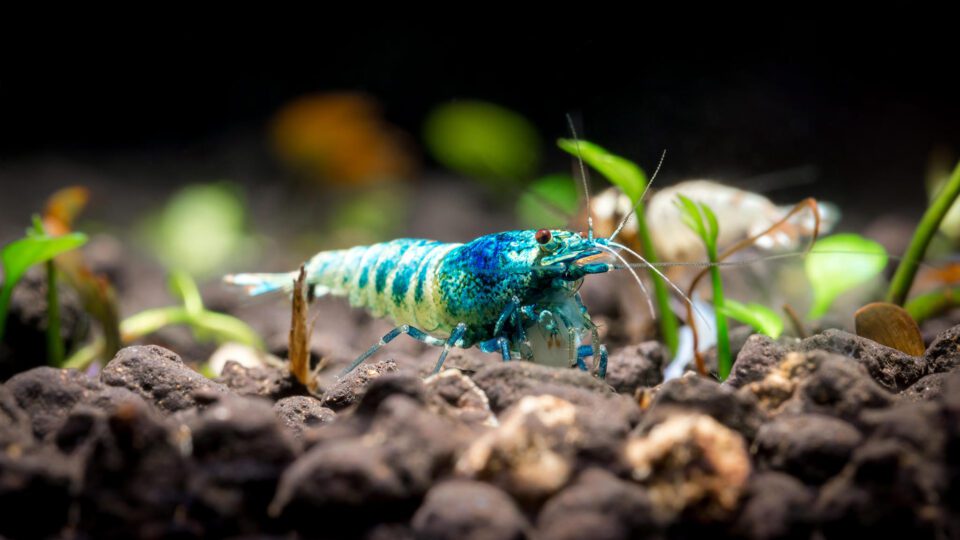
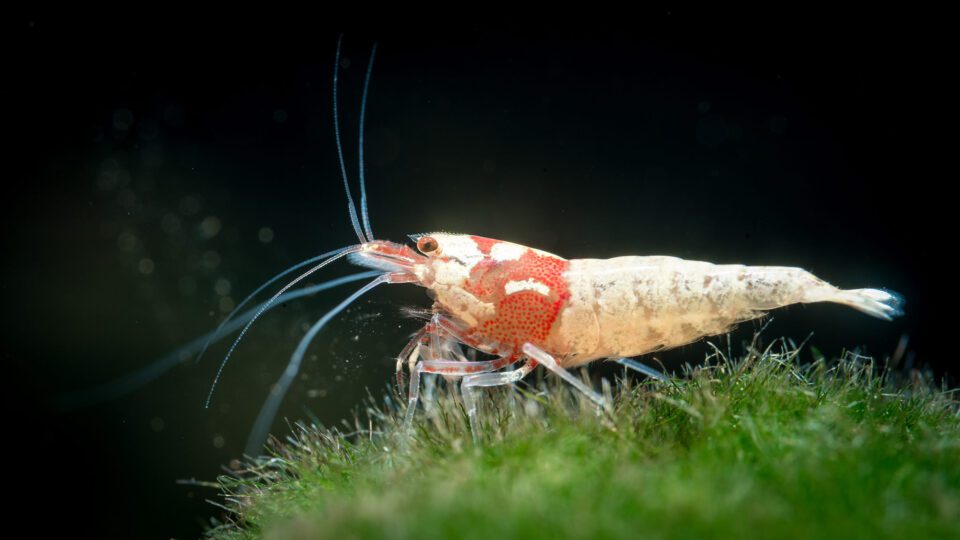
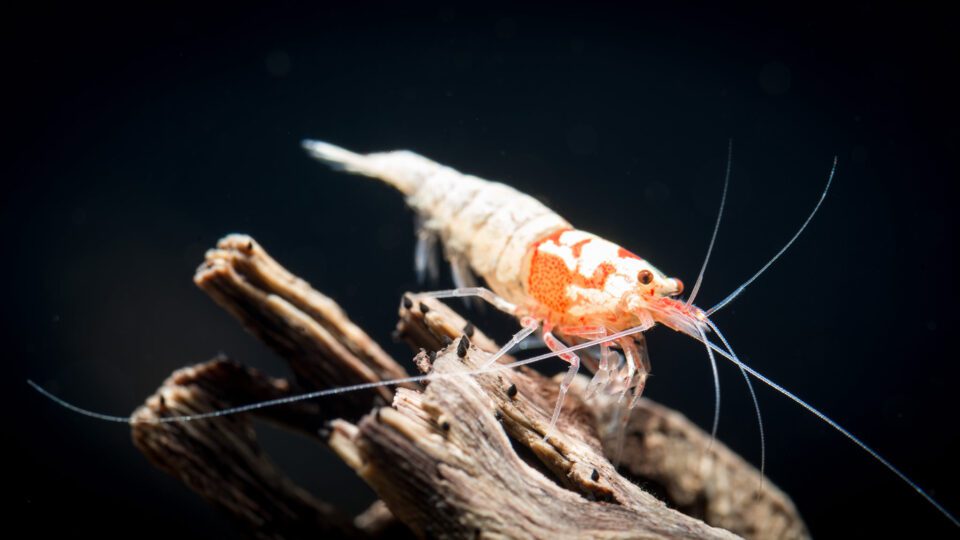
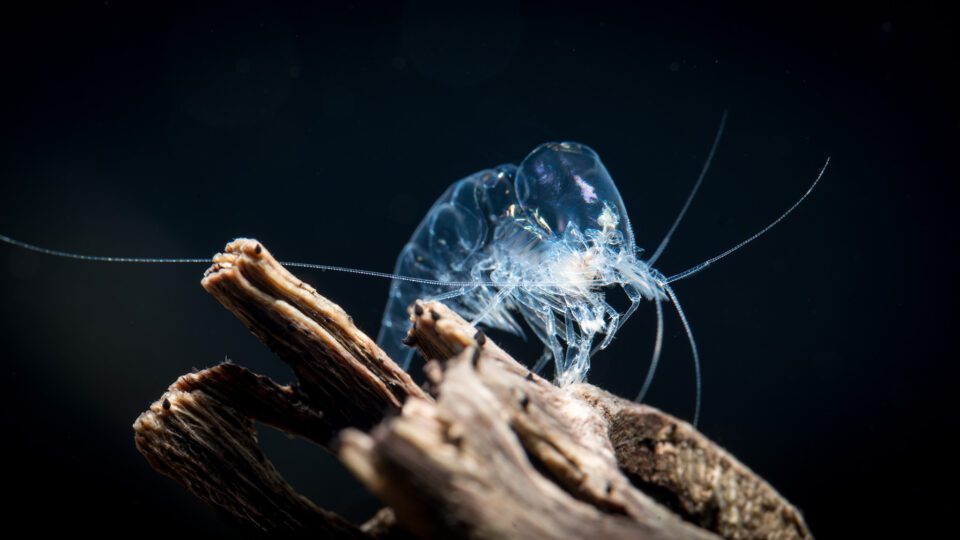
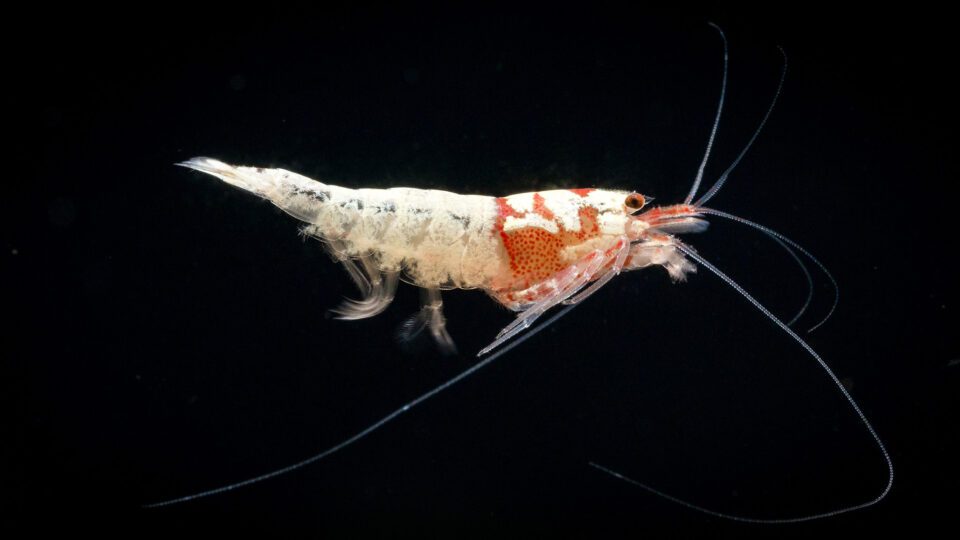
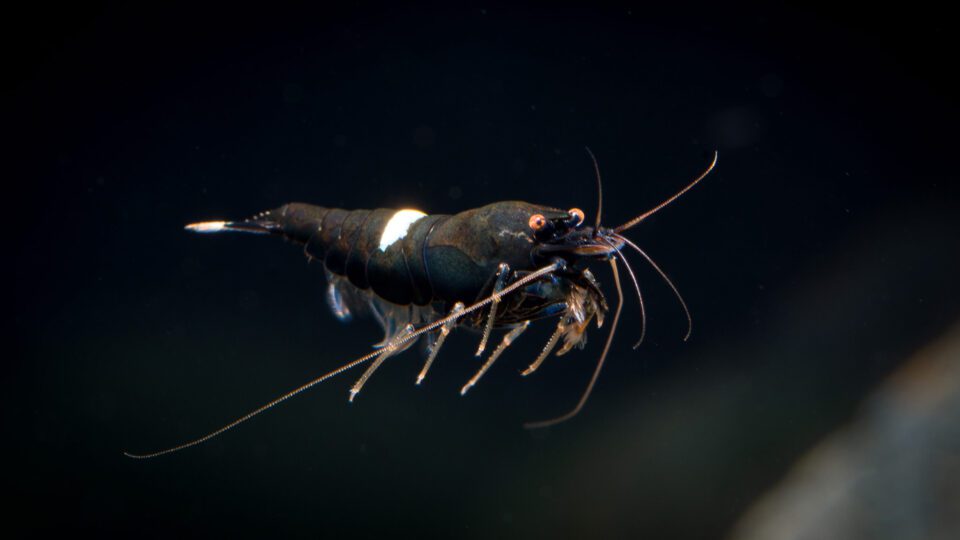
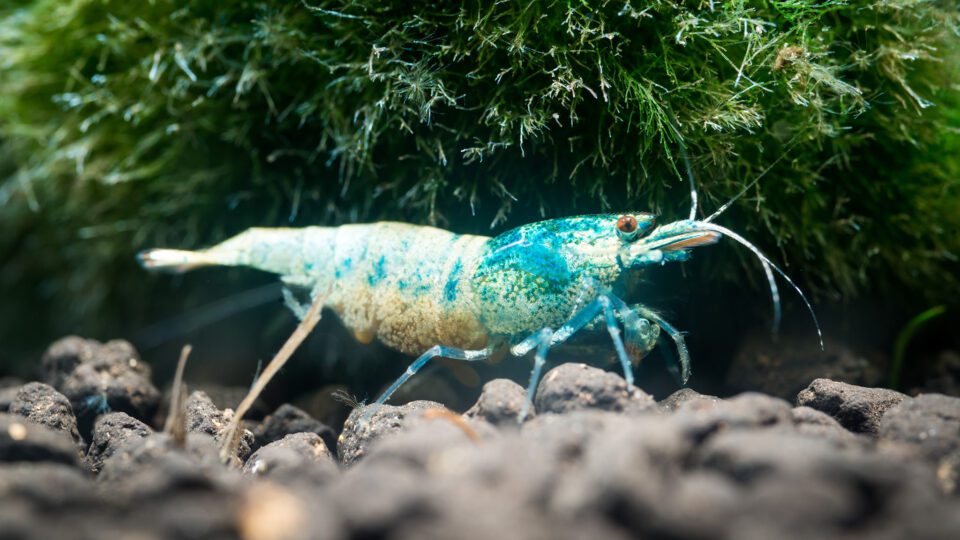
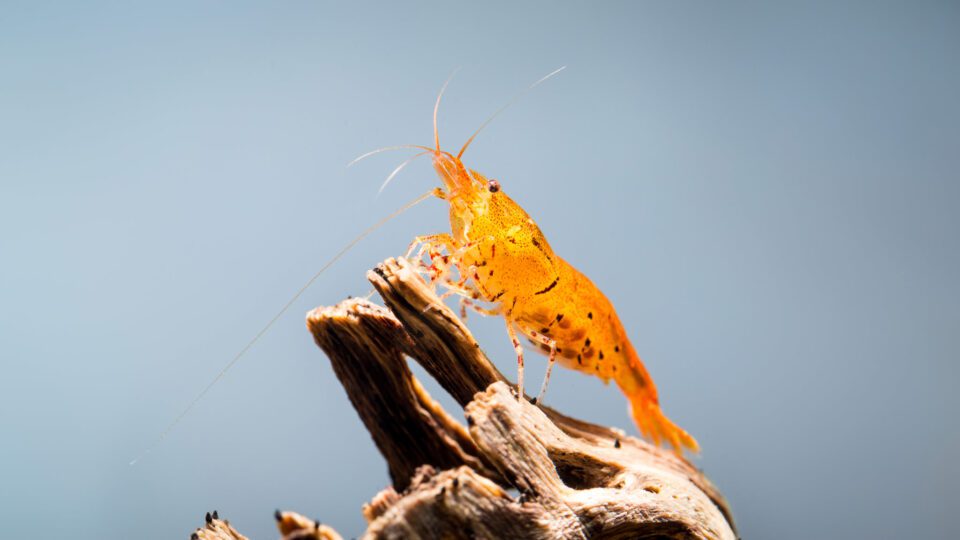
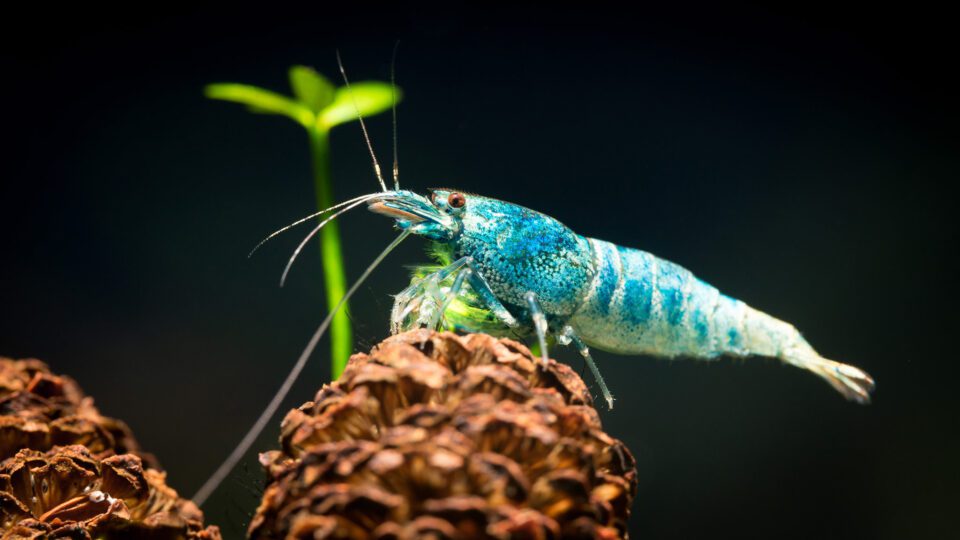
“There’s such a thing as ornamental shrimp?” This is the typical response of family and friends when I speak to them about my recent hobby of keeping ornamental shrimp. Believe it or not, there is growing interest around the world about breeding and keeping these little freshwater critters as pets. In some countries, their popularity even rival traditional fish keeping! What once used to be considered another algae eater in tanks has quickly become an object of interest for aquarium enthusiasts, given their behavior, varieties, and breeding possibilities. They are marvelous to look at, and as such are wonderful subjects to photograph.

Shrimp Macro-13

NIKON D800E + TAMRON SP 90mm F2.8 Di VC USD Macro @ 90mm, ISO 100, 1/400, f/18.0

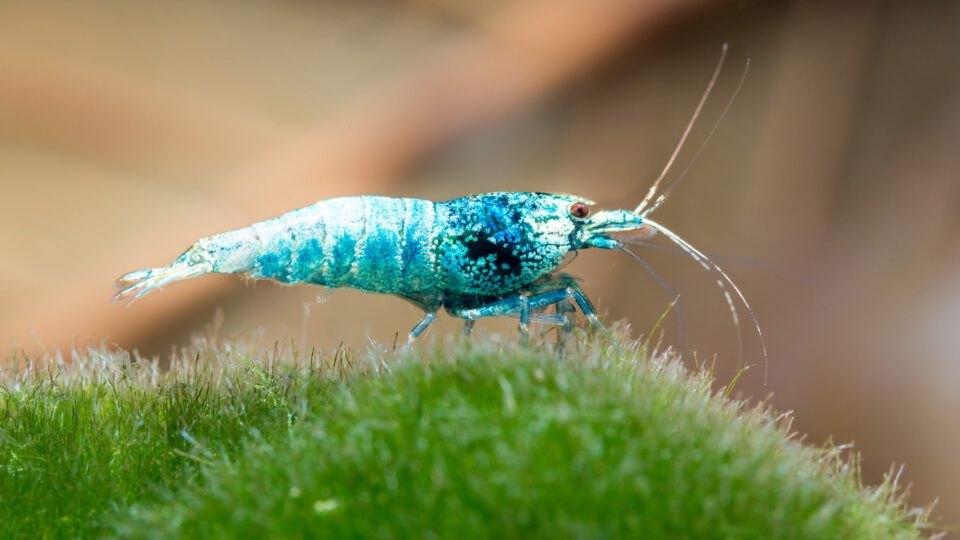
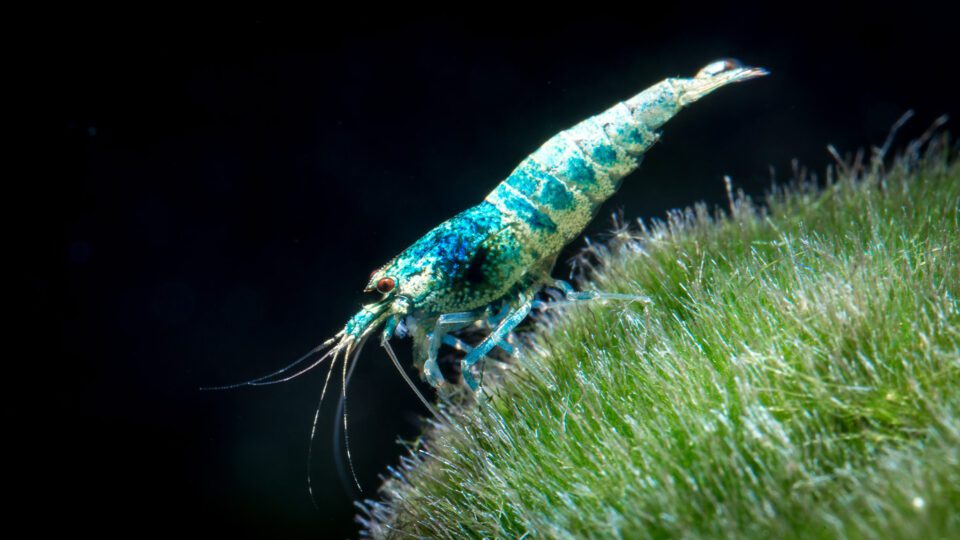
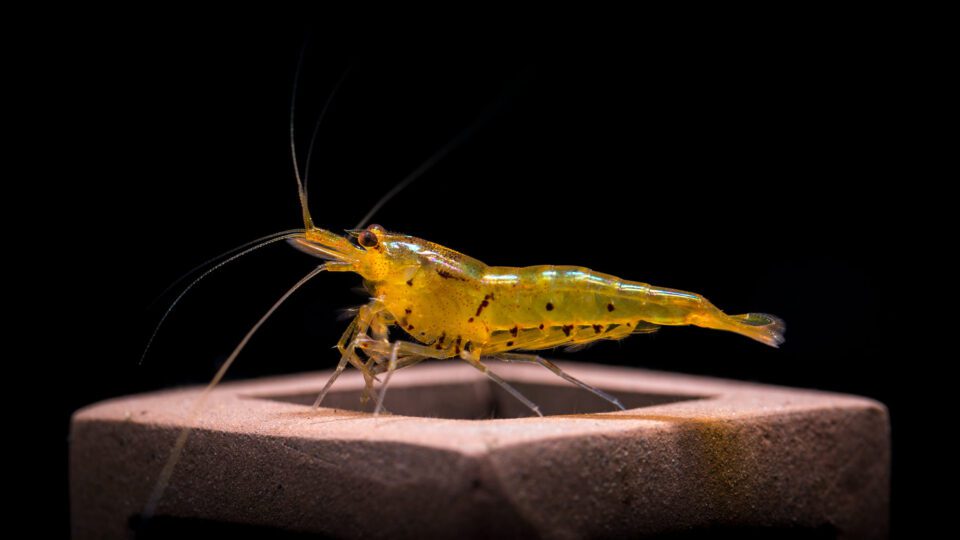
The hobby itself is primarily based upon varieties of Neocardina davidi (cherry shrimp) or Caridina cantonensis, which has recently been further categorized as Caridina logemanni (crystal shrimp), mariae and serrata (tiger shrimp). There’s also a popular variety called Taiwan Bees, which originate from a crystal x tiger shrimp crossing, and come in a large range of colors and patterns. They grow no larger than 2 to 3 cm in length (hence the macro realm of photography), reach reproductive maturity in 3 to 5 months, and have a lifespan that can reach about two years. My own shrimp collection is comprised of blue bolts, pinto mischlings, pandas, king kongs, and tangerine tigers; I hope you enjoy looking at them as much as I do!
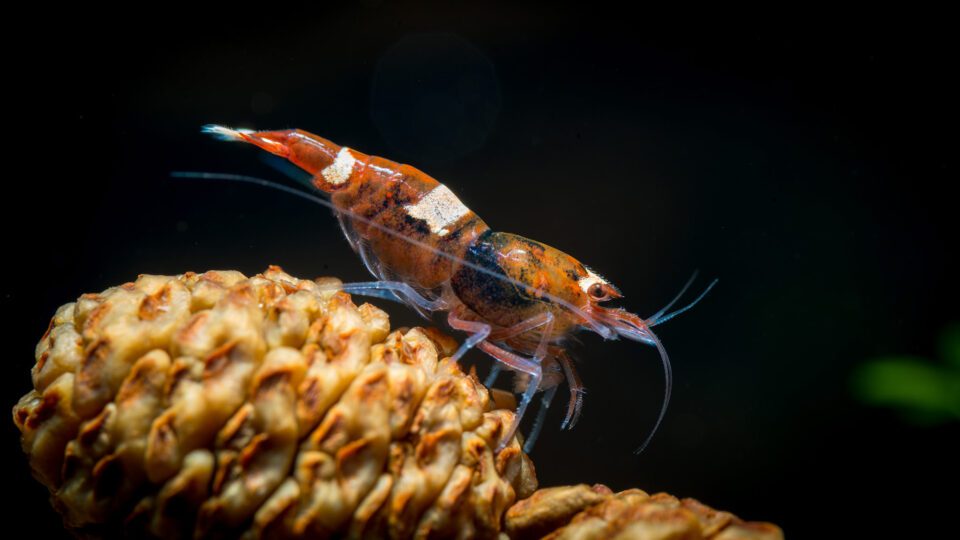
Shrimp Macro-5

NIKON D800E + TAMRON SP 90mm F2.8 Di VC USD Macro @ 90mm, ISO 100, 1/250, f/16.0

My inspiration to pursue shrimp photography comes from Chris Lukhaup, a famous aquascaper, professional photographer, and one of the world’s leading shrimp specialists. Search for any of his images and you will quickly see why he is always brought out to aquatic conferences and expeditions to document the discovery of new freshwater life. Learning how to capture breath taking images of ornamental shrimp like him has certainly pushed my knowledge and skills in both shrimp keeping and photography.

Shrimp Macro-21

NIKON D800E + TAMRON SP 90mm F2.8 Di VC USD Macro @ 90mm, ISO 100, 1/320, f/20.0

There is the added bonus of being able to do this sort of photography in the comfort of your own home. Photographing your own aquarium means you have all the control in lighting, staging, and specimens. As a father of a young family, nap time for the kids becomes shrimp admiring and macro photography time for me!

Shrimp Macro-10

NIKON D800E + TAMRON SP 90mm F2.8 Di VC USD Macro @ 90mm, ISO 100, 1/250, f/22.0

1) Macro Equipment and Technique Considerations

Like most specialty areas of photography, macro work will require a specific set of equipment to help you achieve the images you want. There are a variety of tools that can help you achieve greater image magnification, such as diopters, extension tubes, and macro lenses. When my brother-in-law first introduced me to his collection of shrimp, I started with a Canon 60D and a 55-250mm STM lens with a Raynox DCR-250 diopter to capture images of his shrimp. This combination allowed me to get up to 0.725x magnification, but the images were grainy since I had shot them at a high ISO with a crop sensor camera.

Shrimp Macro-28

Canon EOS 60D + EF-S 55-250mm f/4-5.6 IS STM + Raynox DCR-250 @ 113mm, ISO 1600, 1/50, f/9.0

Not to say that a crop sensor camera is inadequate! Quite the contrary, Chris Lukhaup himself shoots with a Canon 7D, and many other crop sensor shooters have fantastic shrimp images. Adequate lighting is more important to getting good quality shots after all, but more on that later!

When I started photographing my own shrimp, I had made a jump (from crop to full frame) to a Nikon D600, and now a D800E with a Tamron 90mm VC Macro lens. I also purchased Kenko AF extension tubes to go beyond 1:1 magnification. Given that the size of an adult shrimp is no more than 2 to 3 cm, using a macro lens alone at minimum focus distance (MFD) on a full frame camera generally allows an image of the entire shrimp to be captured, with room to compose the shot as well. Adding on extension tubes can get you closer shots of smaller shrimplets, or various parts of interest on the shrimp.

Shrimp Macro-1

NIKON D600 + TAMRON SP 90mm F2.8 Di VC USD Macro @ 90mm, ISO 400, 1/200, f/40.0

Shrimp Macro-8

NIKON D800E + TAMRON SP 90mm F2.8 Di VC USD Macro @ 90mm, ISO 320, 1/250, f/18.0

Macro photography provides a significant set of challenges in terms of lighting and focus. Shrimp are constantly moving, so focus stacking is generally out of the question. You need a narrow aperture to get enough of the shrimp’s eyes and body in focus, as well as a fast enough shutter speed to capture the image if the shrimp is moving. Most aquarium lights are not bright enough for such aperture and shutter speed combinations, so this means that your images will be shot at a higher ISO rating (1600 or higher). I found that the graininess of the image at such high ISO levels degrade the detail you’d be hoping to capture.

Shrimp Macro-29

NIKON D600 + TAMRON SP 90mm F2.8 Di VC USD Macro @ 90mm, ISO 4500, 1/200, f/6.3

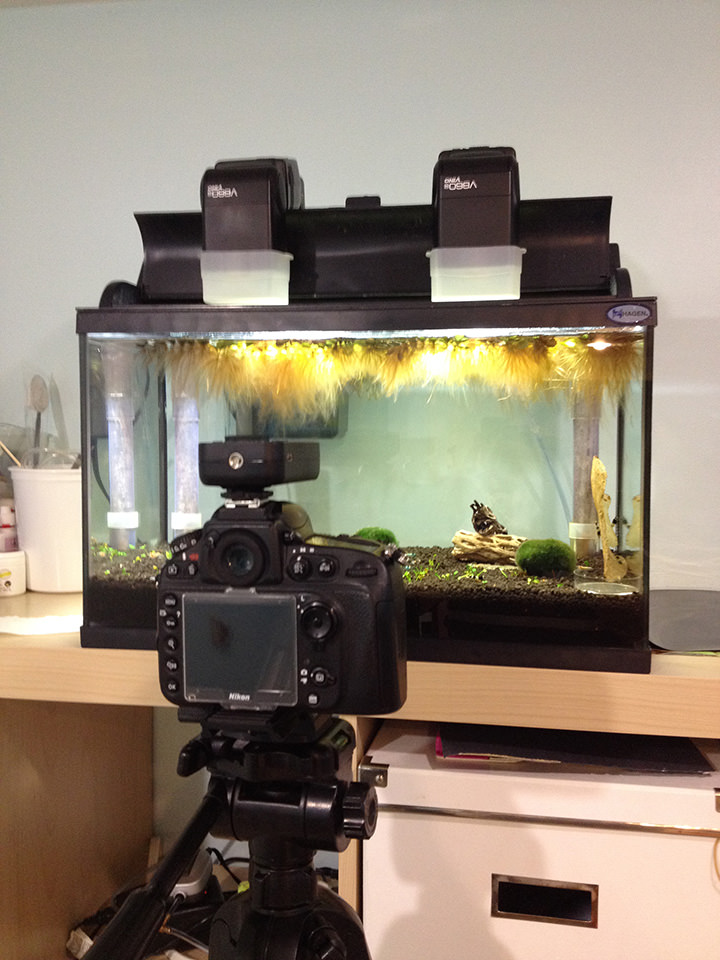
To get the best image quality, shooting at ISO 100 to 400 will most likely require you to use a flash setup to provide additional lighting. This is where your specific aquarium location and setup may lead to some challenges. If you’re like Chris Lukhaup, he uses a soft box above a photoshoot tank to achieve his images. This would require you to have a glass lid or no lid on top of your aquarium. As my own tank is on the top of a tall shelf (I didn’t want my kids to feed my shrimp a coin or candy by accident), I was unable to place a soft box over it. Thankfully, the design of my tank lid allows me to perch one or two flashes with diffusers at various angles just above the water. These flashes are triggered with radio controllers.

Shrimp Macro-26

iPhone 4S shot of my photography setup for shrimp @ 4.28mm, ISO 200, 1/20, f/2.4

Unless your lens is right up against the glass, placing the flash at an angle in front of the aquarium may result in glare in your photo. For those of us lucky enough to have a beautiful rimless tank with no tank lid, you may want to consider investing in a boom, clamps, or clips that can be attached to the top edge of your tanks to mount your flashes. The last thing we’d want is for a flash to fall into the water…

Shrimp Macro-23

NIKON D800E + TAMRON SP 90mm F2.8 Di VC USD Macro @ 90mm, ISO 100, 1/250, f/22.0

In my earlier days of shooting shrimp, I struggled to get good captures since the depth of field was so narrow, even at an aperture of F16. To gain some confidence, I set my aperture to be as narrow as F32 to F40 to try and get more of the shrimp in focus! At these aperture levels, I noticed the effects of diffraction made the images less sharp. After a little research, I found out that my lens and camera body combination allows for sharp images to be taken up to F22 before diffraction sets in. As such, I’ve kept most of my images at F18 to F22 to get the best of image sharpness and depth of field, depending on the angle of the shot. Speaking of angles, you’ll get the least amount of distortion from the aquarium glass in your shots if you are as perpendicular and level to the subject as possible!

Shrimp Macro-4

NIKON D600 + TAMRON SP 90mm F2.8 Di VC USD Macro @ 90mm, ISO 100, 1/200, f/40.0

I have also tried a macro focusing rail for my tripod to stabilize my shots. Essentially, you leave the focus of the lens at MFD and use the dials on the macro rail to take care of focusing, much like using a microscope to focus on a glass slide. This combination did help get sharper images, but it is more cumbersome to work with. The moment you see a shrimp striking a good pose on the other side of the tank, shifting things over and getting things in focus often meant the shrimp has already gone off to graze somewhere else!

I have since resorted back to hand holding my shots, and doing my best to stabilize the camera with good technique (such as bracing in your elbows, holding your breath to steady the camera). I would move forward or backward to focus on the shrimp’s eyes while the lens is at MFD. Using my hands on the edge of the shelf and holding onto the hood also helped stabilize my shots. I did try doing the same with the camera on live view, but the image on the screen would be so dark (given the narrow aperture) that it was still a bit hit and miss, and it also drained the battery life quickly. I believe my number of keepers have improved since I purchased a DK-17M magnifying eyepiece to help see when the shrimp’s eyes are in focus. If all this doesn’t help you get sharp macro images, consider getting your lens calibrated too.

Shrimp Macro-20

NIKON D800E + TAMRON SP 90mm F2.8 Di VC USD Macro @ 90mm, ISO 100, 1/320, f/20.0

2) Aquarium Layout and Setup Considerations

For those of us who are unaware, aquariums can be purchased with different types of glass. Regular aquarium glass contains more iron, and thus naturally has a greenish tint to it. Starphire (sometimes called Starfire) glass contains less iron, and thus has a bluish tint to it. Many hobbyists will tout that looking at subjects in a more expensive starphire tank makes for a better viewing experience, but it is known to be a softer glass that may get scratches more easily. From a photography point of view, I would assume that any color changes from the aquarium glass can be easily fixed in post-processing. Thicker glass tanks can also lead to greater image distortion if you are not shooting square on the subject.

Shrimp Macro-9

NIKON D800E + TAMRON SP 90mm F2.8 Di VC USD Macro @ 90mm, ISO 100, 1/250, f/16.0

There are many interesting props that can be used for the shrimp to perch and pose on. There are a large variety of plants, leaves, cones, wood, rocks, and ceramic structures that can serve as the main stage or background for your shots. Different backgrounds for the aquarium itself can be purchased to provide the right backdrop. Shooting at a narrow aperture also means the background will appear darker, so you may consider using a backlight to fill the background. Personally, I like the low key style shots with most shrimp as it provides a nice contrast to the shrimp, and so I have a black aquarium background. Much like taking a picture of a person with dark hair with a dark background, darker shrimp may benefit from getting a kicker light or a lighter background for contrast.

Shrimp Macro-22

NIKON D800E + TAMRON SP 90mm F2.8 Di VC USD Macro @ 90mm, ISO 100, 1/250, f/18.0

For my particular lens and camera combination, the MFD is 30 cm from the sensor (as indicated with a symbol that has a line going through a circle near your eye piece). This means that I have about another 5 cm of room to work with beyond my lens with a hood (about 10 cm without the hood). When my moss balls, alder cones, and cholla wood pieces were initially placed too far from the front of the tank, I was unable to focus on a shrimp at 1:1 magnification if they were perched on these objects. I can’t recall how many times I’ve bumped into the tank as I was trying to get a shrimp in focus! As such, I moved these objects closer to the front of the tank to give me more room to work with and get 1:1 magnification. Be careful about taking images of the shrimp that are too close to your aquarium glass though, as the image will pick up scratches and imperfections in the aquarium glass if it isn’t clean.

Shrimp Macro-6

NIKON D800E + TAMRON SP 90mm F2.8 Di VC USD Macro @ 90mm, ISO 100, 1/250, f/20.0

3) Shrimp Moments: Behavior and Physiology Considerations

Ornamental shrimp are bottom feeders and scavengers with limited storage in their digestive system. As such, they are constantly moving around feeding off of algae and bacterial biofilm on the surfaces of aquarium. They can certainly be lured to new foods that you drop in, and some food are made so that each shrimp can run off with a nugget of food in their claws. This will allow you to get the shrimp to be more stationary for your shots, but it also means you’ll be getting food debris in your shot and a less natural looking image.

Shrimp Macro-2

NIKON D600 + TAMRON SP 90mm F2.8 Di VC USD Macro @ 90mm, ISO 100, 1/200, f/32.0

I recall how frustrated I was waiting for a shrimp to perch itself on a marimo ball one evening. I decided to take a pair of tongs and flipped the marimo ball over to expose a portion of it that had untouched biofilm on it. This prompted a few shrimp to come over to investigate and graze, which allowed me to get some nice shots of them on the ball of moss. Editing out the food debris was tedious in post processing, but not impossible. Speaking of foods, various foods alter the hormonal control of pigment cells in the shells of the shrimp. Healthy shrimp will give off very vibrant colors in their shells! Discoloration may indicate that the shrimp is stressed or unhealthy.

Shrimp Macro-11

NIKON D800E + TAMRON SP 90mm F2.8 Di VC USD Macro @ 90mm, ISO 100, 1/250, f/22.0

Watching shrimp molt out of their old shell is an interesting event to witness. When they have grown larger, they will burst out of their shell and leave behind a ghostly outline of their prior shape. Molting can often be witnessed after water changes are done to the aquarium, or after a low pressure weather system such as rain passes by. Don’t remove the molts though, as they provide good nutrition for other shrimp in the tank!

Shrimp Macro-18

NIKON D800E + TAMRON SP 90mm F2.8 Di VC USD Macro @ 90mm, ISO 100, 1/320, f/20.0

Shrimp Macro-19

NIKON D800E + TAMRON SP 90mm F2.8 Di VC USD Macro @ 90mm, ISO 100, 1/320, f/20.0

When a female is ready to mate, they also molt and release chemicals that attract males in the water. Females are quite timid after completing a molt that gives her tail the right shape to carry eggs, and so she tries her best to hide from males. The males swim actively all over the tank in search for the female, and many breeders call this movement of swimming “the dance”. This is a great time to get shots of “shrimp in flight”, as they actively seek all corners of the tank for the ready female.

Shrimp Macro-16

NIKON D800E + TAMRON SP 90mm F2.8 Di VC USD Macro @ 90mm, ISO 800, 1/1000, f/20.0

Shrimp Macro-12

NIKON D800E + TAMRON SP 90mm F2.8 Di VC USD Macro @ 90mm, ISO 100, 1/250, f/20.0

When female shrimp are carrying eggs, or are “berried”, they tend to be shy and hide more early on. Startling them too much with flash photography may stress them out, which may subsequently cause them to drop their eggs. Being “berried” does lead to hormonal changes that make their shells more colorful though. After carrying the eggs for about 4-5 weeks, the shrimplets hatch from below the female and get ready to brave a whole new world.

Shrimp Macro-17

NIKON D800E + TAMRON SP 90mm F2.8 Di VC USD Macro @ 90mm, ISO 100, 1/250, f/16.0

Shrimp Macro-24

NIKON D800E + TAMRON SP 90mm F2.8 Di VC USD Macro @ 90mm, ISO 100, 1/250, f/18.0

4) Conclusion

Aquarium photography at home provides a convenient opportunity to capture images of our water based pets and learn about their behavior. Many of the ideas and techniques shared here can be applied for taking pictures of crabs, snails, and fishes too. Factoring in the macro component brings an additional layer of challenges, but the rewards are in the details that are missed by the naked eye. If you want to see the best of your ornamental shrimp in a photo, consider doing the following:

  • Clean your aquarium glass before shooting (such as algae scrubbers)
  • Do a water change to get cleaner water in the tank
  • Temporarily turn off filters to avoid getting too many air bubbles in the shots
  • Feed ahead of time to boost their shell coloration and to avoid getting food particles in the shots
  • Shoot as perpendicular and as level to the shrimp as possible
  • Have ample lighting to allow you to use a lower ISO, faster shutter speed, and suitable aperture
  • Post-processing with adequate sharpening, removal of sensor dust, and tank debris
Shrimp Macro-15

NIKON D800E + TAMRON SP 90mm F2.8 Di VC USD Macro @ 90mm, ISO 400, 1/500, f/20.0

I hope that taking and sharing inspiring photos of your aquatic pets will promote further understanding and growth in those hobbyist areas. If you are interested in shrimp keeping and breeding, I highly recommend searching for and connecting with international and local communities online to learn more about the hobby.


This guest post was submitted by Steven Chan, a father, science teacher, and photographer from Toronto, Canada. Besides taking photographs of his family, he loves shooting pictures of wildlife and macros of his shrimp. You can see some of his work here, and specific shrimp photography here. He also thanks Nasim, Thomas, and Spencer for their informative articles and gear reviews that were referenced. They have been instrumental in his learning and purchases, and they have taught him how to be a better and more mindful photographer overall. Thank you!

The post Aquarium Macro Photography of Ornamental Shrimp appeared first on Photography Life.


from Photography Life https://photographylife.com/aquarium-macro-photography-of-ornamental-shrimp

A Scottish Espresso

When your everyday life consists of commute-work-commute-sleep-repeat, holiday time is scarce and precious. What better incentive to make the most out of it? Earlier in July, I decided to set up for a quick adventure in the Scottish highlands with a keen photographer friend of mine. I had seen wonderful pictures of this country, and wanted to experience it for myself.

Public disclaimer: I am a French guy living in London, so please bear with me while I tell you a story in a language that is not my first.

With every good trip comes good preparation. I spent a tremendous amount of time browsing several resources in the quest of good photography spots:

  • Flickr map
  • Walking Highlands
  • 500px
  • Youtube
  • Trip Advisor

In a matter of days I had a perfectly coordinated 8 days trip around the country ready to start. To keep things authentic, and to make this journey as photography friendly as possible, my friend and I decided to rely on wild camping throughout the trip. Scotland’s freedom to roam makes it the ideal destination for campers.

With the gear ready (see list at the bottom of the article), we set off for an early start to Heathrow airport, en route to Inverness.

Ben Nevis

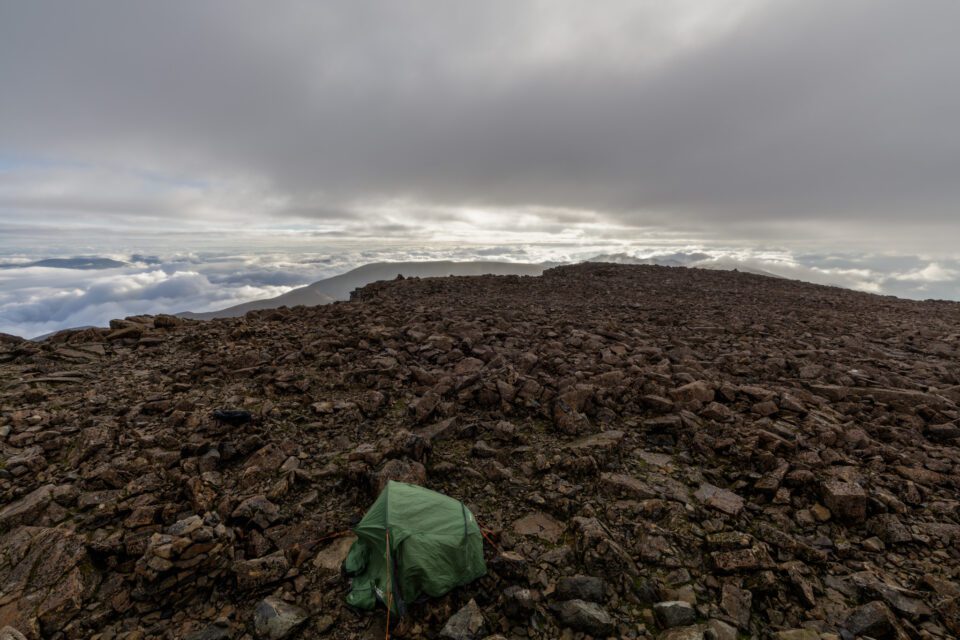
After landing in Inverness and sorting the car rental, a 2-hour drive along Loch Ness and other landmarks lead us to Fort William and Glen Nevis Visitor centre. This is where the Ben Nevis Mountain trail starts. Ben Nevis is the highest mountain in the UK, reaching 1,346 meters. (For those of you living in the Rockies, Nepal, or the French Alps, it might sound underwhelming). After sorting out our gear, we set up for the climb late afternoon. After a long and demanding 3 –hour climb in light drizzle later, we were on top of the mountain. To our surprise, snow was still around and the mountaintop was nothing but pointy rocks. Not the ideal tent location. After pitching and re-pitching our shelter in freezing cold conditions, we were ready to spend what was to me the worst night of camping I have ever experienced.

Image 1

Comfort standards
Canon 5DSr, Zeiss Distagon T* 15mm f/2.8, f/8, ISO 100, 1/160

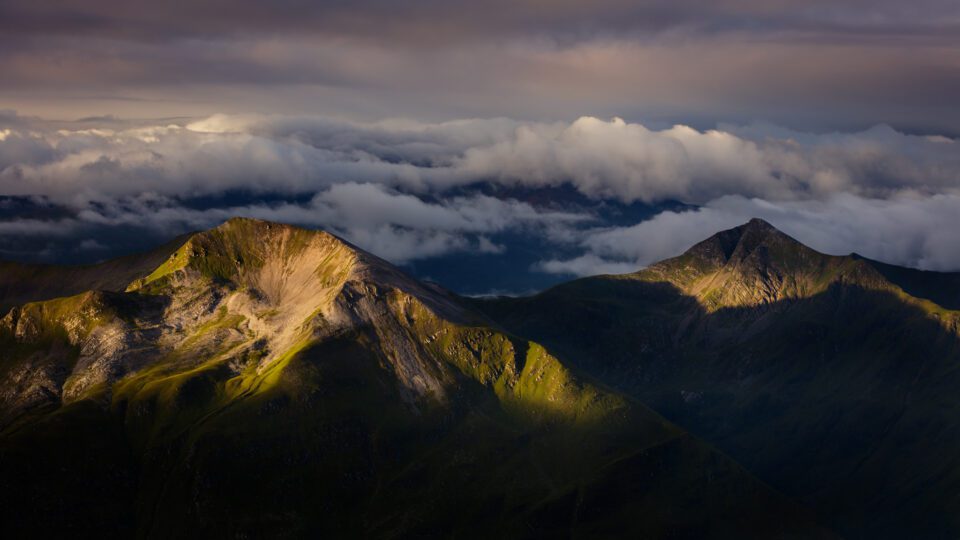
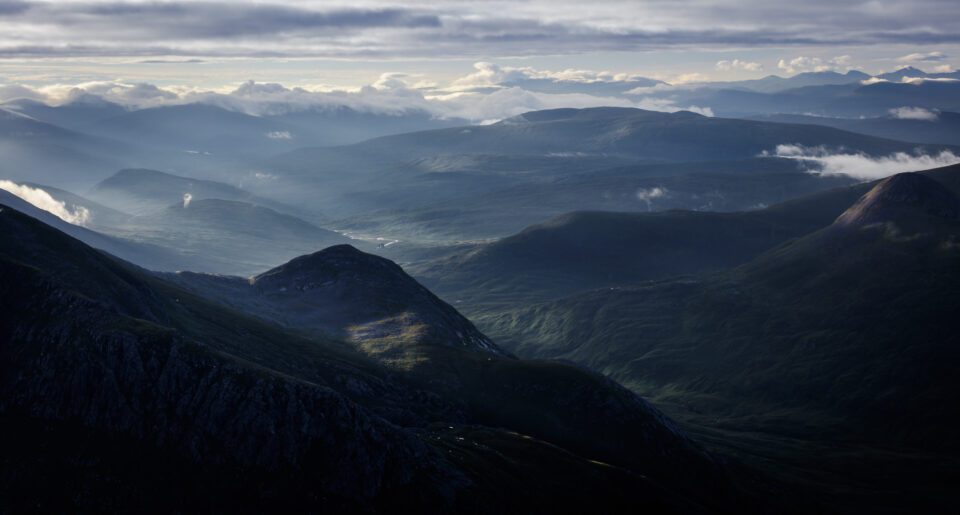
The next morning however, the weather had finally improved and we were blessed with a good 40 minutes of sunrise light.

Image 2

South-South-West view
Canon 5DSr, Canon 70-200mm f2.8L, f8, ISO 100, 1/50, 70mm

Image 3

South View
Canon 5DSr, Canon 70-200mm f2.8L, f18, ISO 100, 1/15, 70mm

After this brief window, the clouds covered the mountain again, as we started our 2-hour descent back to the car.
Overall we were drenched, cold and tired. Lesson learnt: next time set off early, bring plenty of plastic bags to keep our clothes dry, and layer up!

Loch Tulla

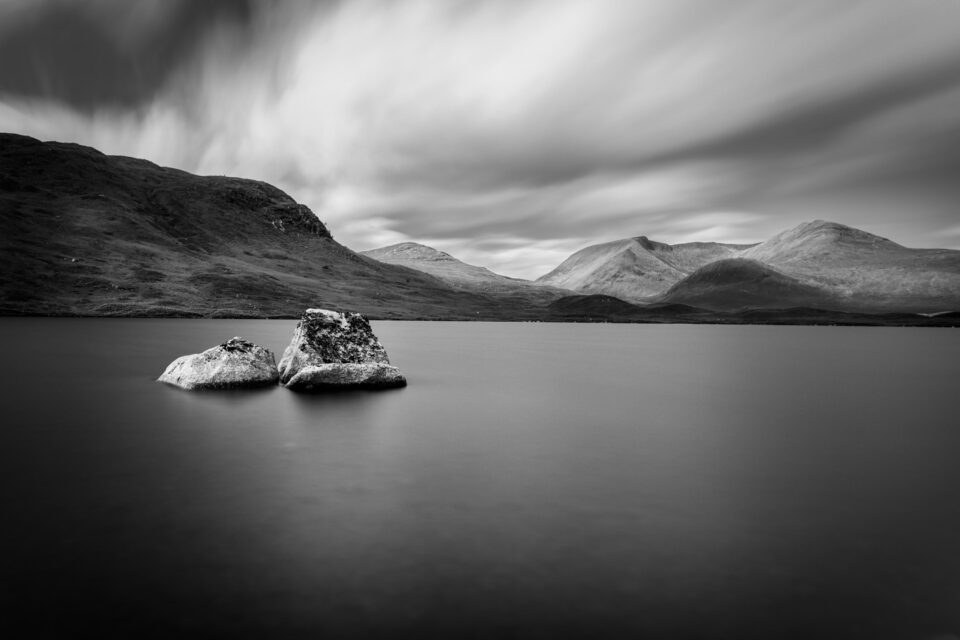
After drying up our stuff in the car for ages, we decided to explore further south. A short drive took us to Loch Tulla, a wonderful place right by the main road (A82). We took a needed sunny break on one of its beaches. With plenty of fluffy cumulus blazing across the sky, it was the perfect long exposure opportunity.

Image 4

Clouds over Loch Tulla
Canon 5DSr, Canon 16-35mm f4L, f5.6, ISO 100, 4min 22sec, 30mm

I highly recommend this spot to anyone looking for a good view without having to leave the comfort of a car.

Dornie Castle

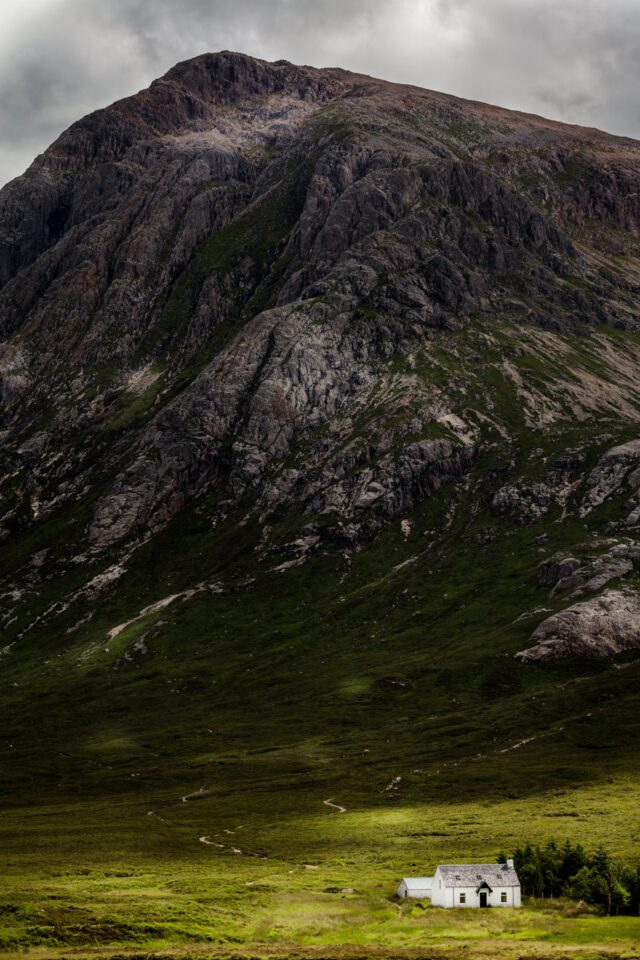
The original plan was to spend two days on the mainland and then travel to Skye for the rest of the trip. On the way to Dornie, the last agglomeration before the bridge to Skye, pictures opportunities rise at every corner of the road. If your GPS suggests a slightly longer scenic journey, by all means, do follow it.

Image 5

An isolated house in front of a mountain
Canon 5DSr, Canon 70-200mm f2.8L, f8, ISO 100, 1/125, 80mm

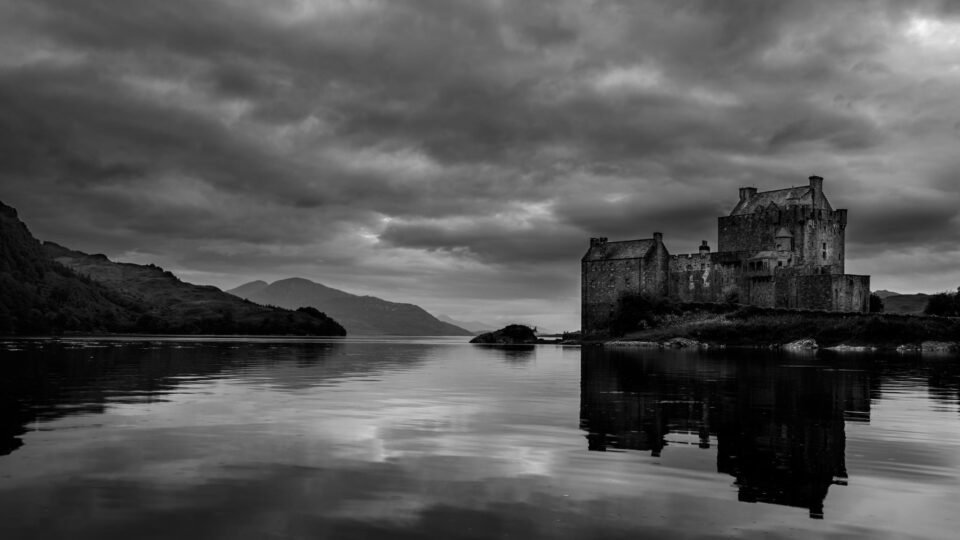
After a rather long drive, we reached our destination for the night. Dornie Castle is a wonderful sight, as it offers everything a classic Scottish image would look like: a dramatic castle overlooking a loch, and mountains in the distance.

Image 6

Dornie Castle
Canon 5DSr, Canon 16-35mm f4L, f8, ISO 100, 1/13, 35mm

We set up camp further East, by the Murchison Memorial. This time it was not the cold, or the rocks, or even the rain. It was the local unwanted visitors: midges. I knew they were a problem, and I took every precaution when packing my stuff to bring sufficient protective gear, but I would never have guessed it would be that bad. If you are reading this article and planning to visit Scotland in summer, and you think your usual mosquito face net would cope, well the answer is: it will not. These things are tiny enough to get through even the minutest mesh. If there is one thing to buy before your trip, it is a proper midge-proof face net. The rest is optional…

Blà Bheinn

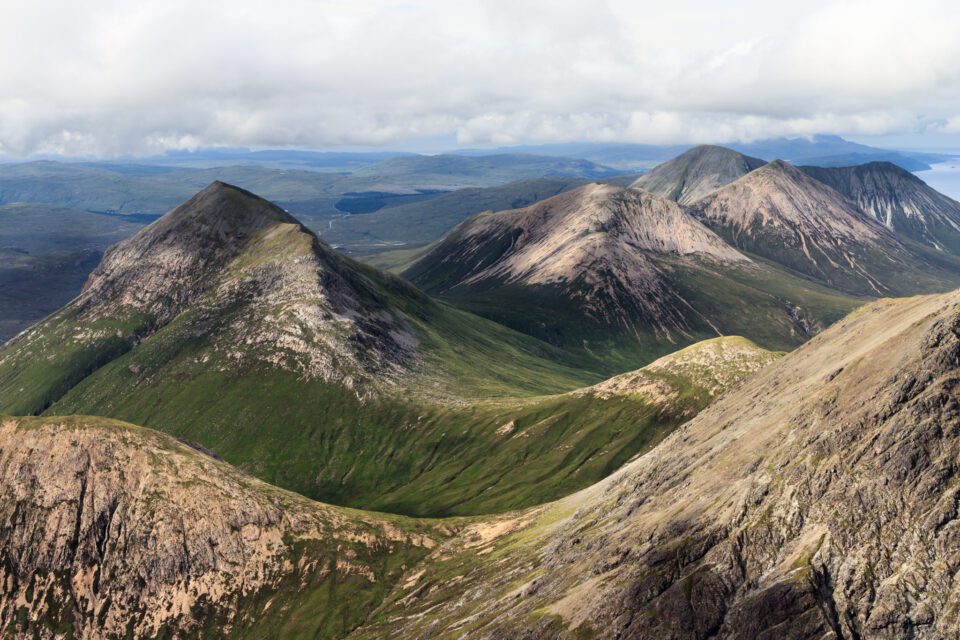
Not discouraged after our Ben Nevis climb, we hit the road early in the morning. After crossing the bridge and refuelling in Broadford, we continued our journey to our next Munro climb: Blà Bheinn, a 928 meters mountain standing proud on the Isle of Skye. While Ben Nevis was packed with climbers the morning of our descent, we had the mountain almost to ourselves. We started our climb reasonably early in wonderful sunny conditions. The ascent felt way more strenuous this time, probably due to the higher grade of the slope and the uneven rocky terrain. After a good 3 hours of climbing and scrambling, we made it to the top, where a magnificent view unfolded before our eyes. I am afraid my pictures will not give proper credit to the beauty of our surroundings.

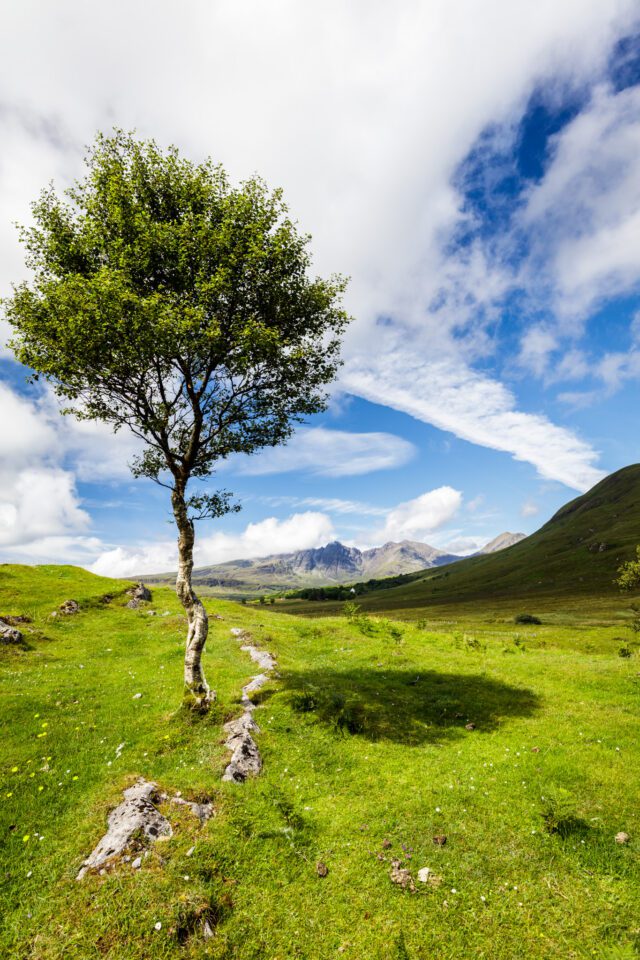
Image 7

Blà Bheinn in the distance
Canon 5DSr, Canon 16-35mm f4L, f8, ISO 100, 1/80, 20mm

Image 8

Succession of peaks
Canon 5DSr, Canon 16-35mm f4L, f8, ISO 100, 1/125, 32mm

After a terribly windy and sleepless night, we started our descent and reached our car just as it started to rain. Drained by the lack of sleep and intense efforts, we agreed to take it easy for at least a day.

Elgol

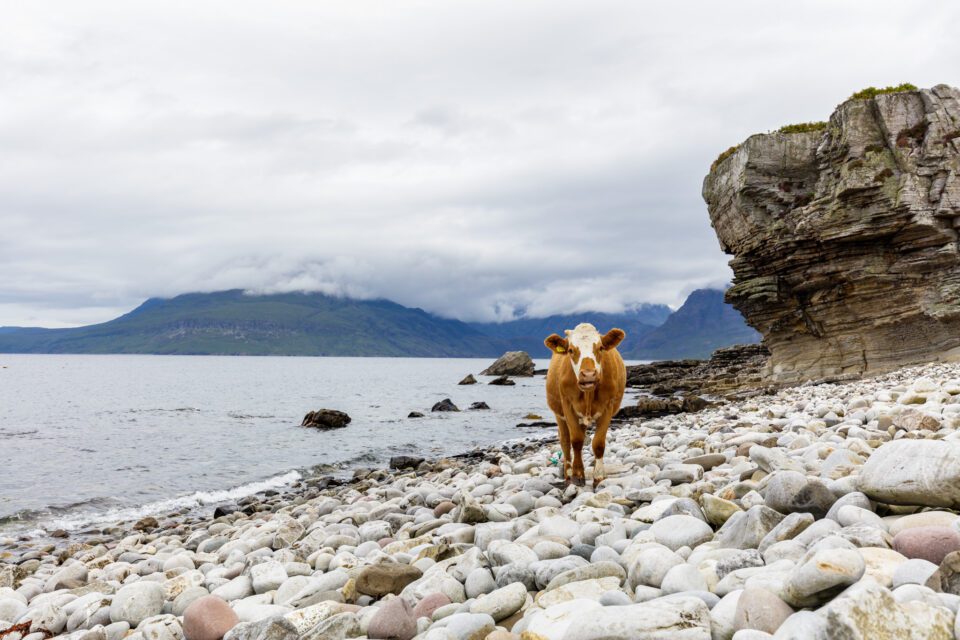
Eglol is a small town on the south tip of the Isle of Skye. After seeing it in several travel guides, I was expecting quite a sight. In reality, there is not a lot to it, unless you embark on one of the several marine wildlife boat tours that start from there. As it was not on our list, we went for a walk on the pebble beach. To our surprise, we realised we were not the only ones walking around. Cows were freely roaming, making for some interesting image juxtaposition.

Image 9

A cow on a beach
Canon 5DSr, Canon 16-35mm f4L, f7.1, ISO 100, 1/100, 35mm

Sligachan

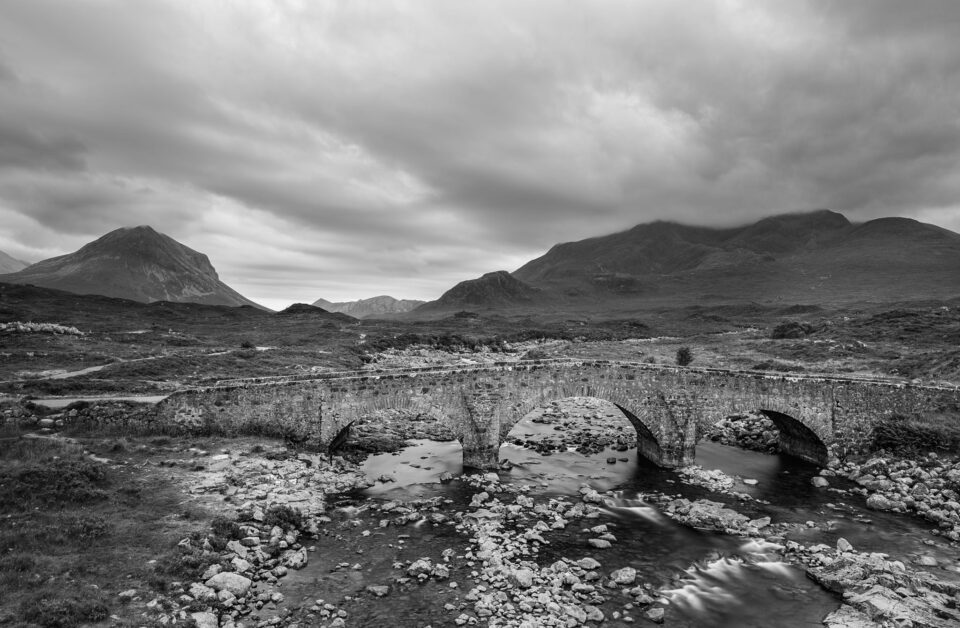
Sligachan is a small agglomeration lost on the crossroad of two main travel routes (A87 and A863). It is home to a lovely bridge, a hotel, a pub and a local brewery. Despite the small size, it is rammed with tour coaches and tourists (after all, I am a tourist as well).

Image 10

One long exposure and you are suddenly on your own
Canon 5DSr, exposure blending (one long for the bridge and river, one short for the sky)

After a few days of canned fish and white bread, the idea of a good meal was too tempting. We caved in and were treated with delicious and reasonably priced (for the quantity) food at the Sligachan hotel pub. This, along with the Scottish whisky tasting menu, made our midge-infested riverside campground almost pleasurable.

Image 11

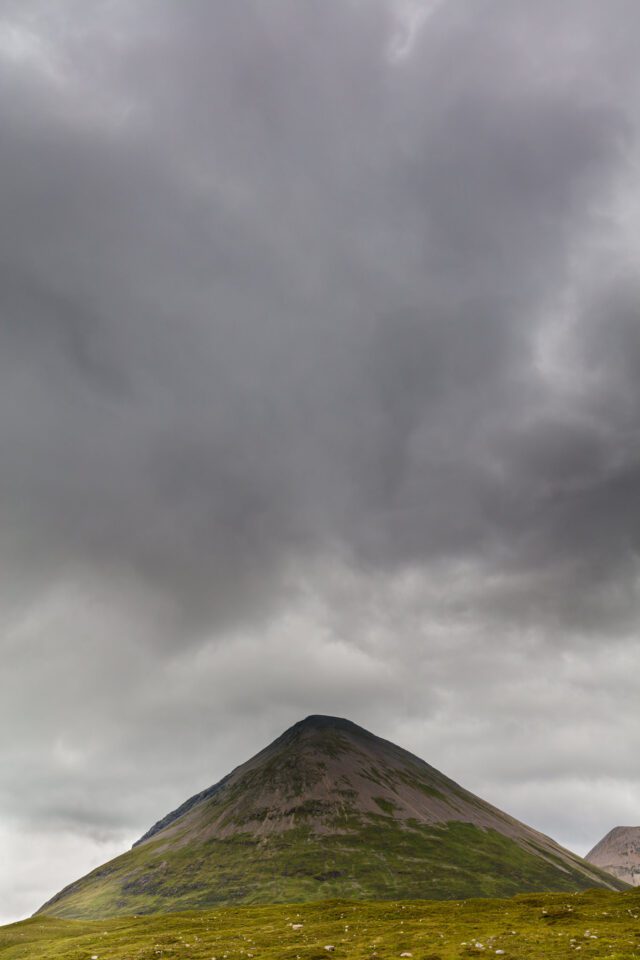
A lone hill in Sligachan
Canon 5DSr, Canon 16-35mm f4L, f8, ISO 100, 1/20, 35mm

Fairy Pools

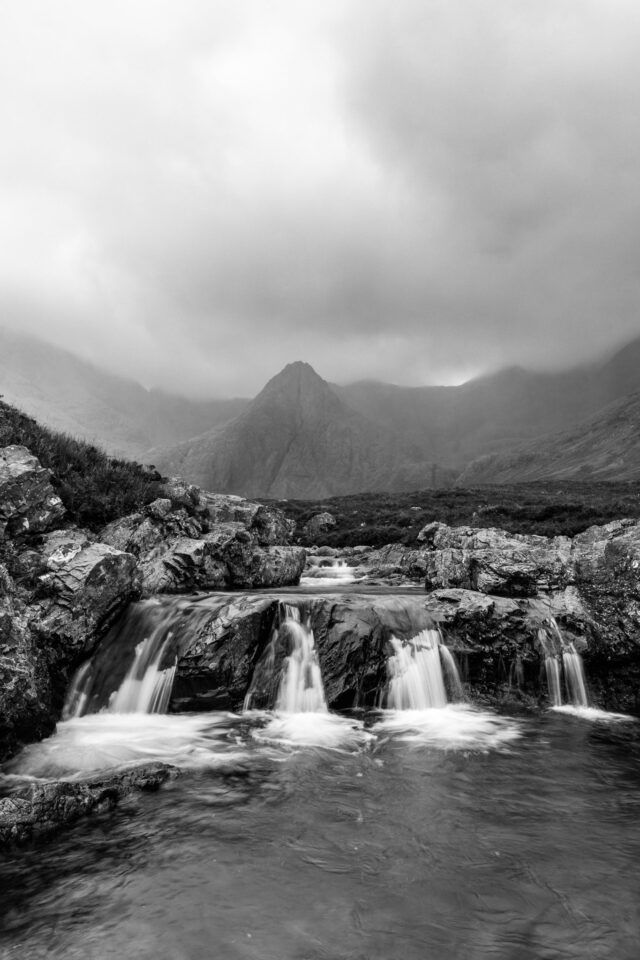
Following the A863 south, we reached one of the most popular locations on Skye: the Fairy Pools. It is a succession of waterfalls with incredible features behind every bend. Luckily (or not) the weather was dreadful, leaving the place a little less crowded. With the help of my trusty rain cover, I was able to carry on shooting with peace of mind.

Image 12

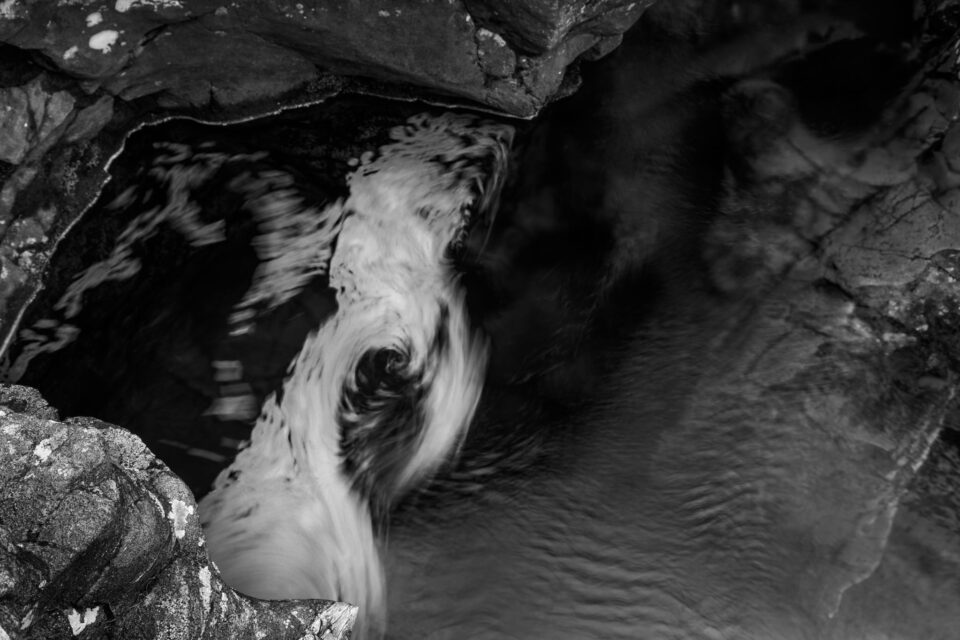
Long exposure whirlpool
Canon 5DSr, Canon 16-35mm f4L, f16, ISO 50, 1 sec, 35mm

Image 13

The iconic waterfall
Canon 5DSr, Canon 16-35mm f4L, f16, ISO 50, 0.3 sec, 24mm

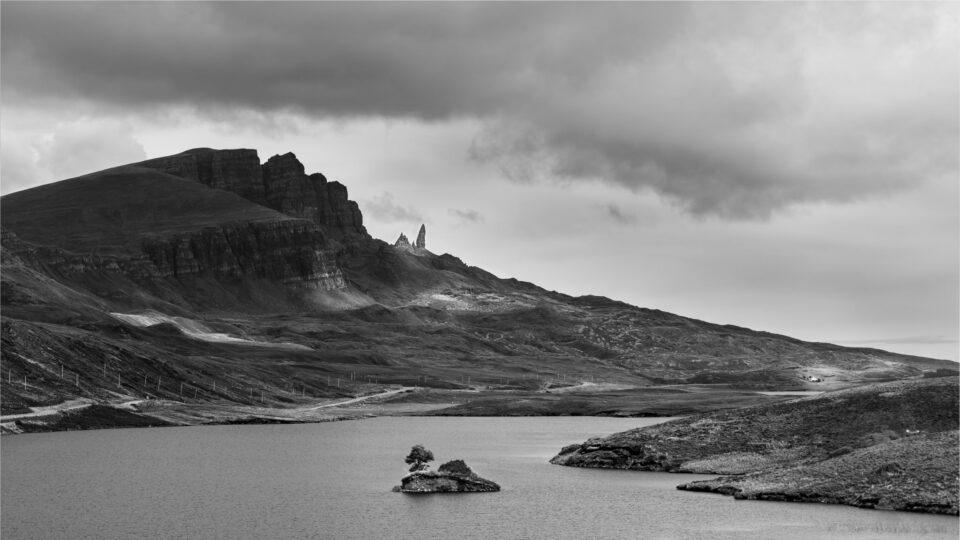
The Old Man of Storr

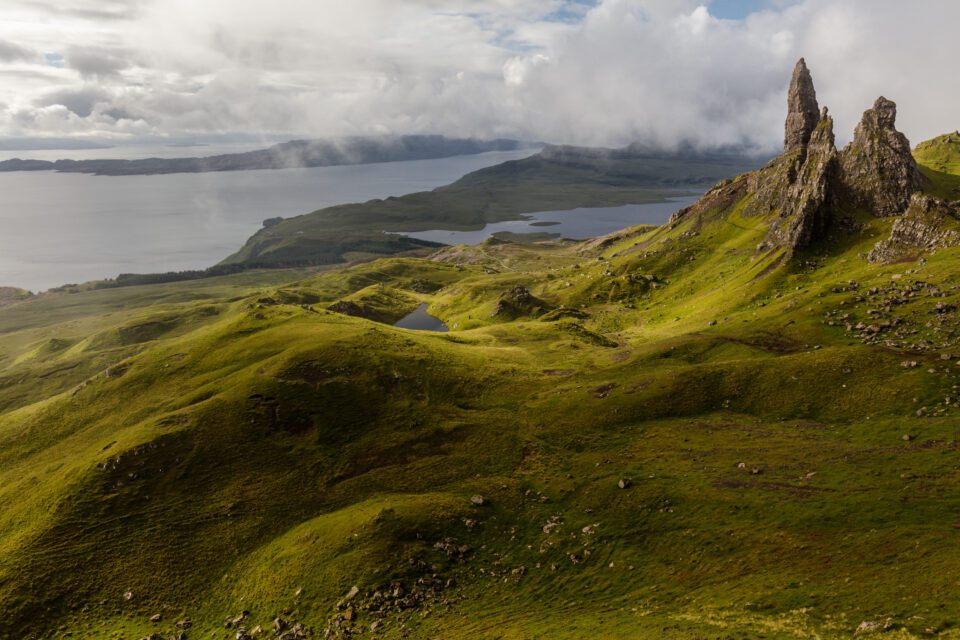
Our last big walk on our list would take us to probably the most popular location on Skye. The Old Man of Storr, a large pinnacle of rock standing apart from the main plateau. While the scenery is breath-taking, one thing for sure, you are not alone. The long and winding path makes the crowd even more noticeable.

Image 14

A great view point over the Old Man
Canon 5DSr, Canon 70-200mm f/2.8L merged exposures

Between the teenage girls blasting music with their phones, the drunk and noisy lads, the guys shouting out loud to test the echo, you certainly cannot forget you are in a popular place.
Good news is, not everyone is willing to spend the night in a tent (and carry it around all day in the first place), which meant that we had the place for ourselves a few hours before sunset and a few hours after sunrise. A few peaceful and quiet moments are worth every hurdle.

Image 15

Tent with a view
Canon 5DSr, Canon 16-35mm f4L, f13, ISO 100, 1/60, 24mm

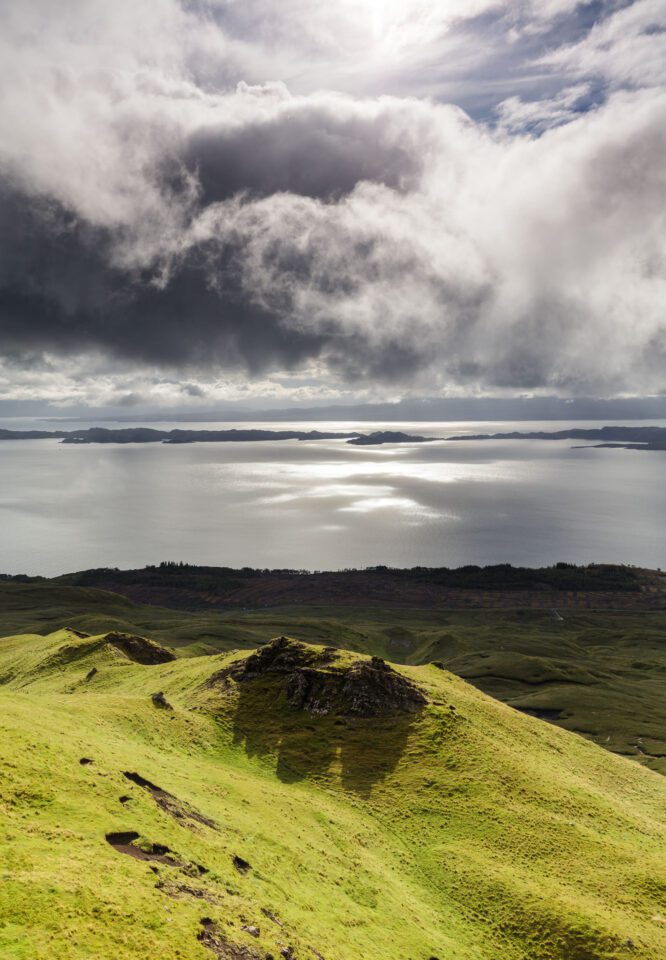
Image 16

Breaking Clouds
Canon 5DSr, Canon 16-35mm f4L, f8, ISO 100, 1/60, 35mm

We climbed down in torrential rain (once again), hopped in a car and drove to our last location on Skye.

Kilt Rock and Mealt Falls

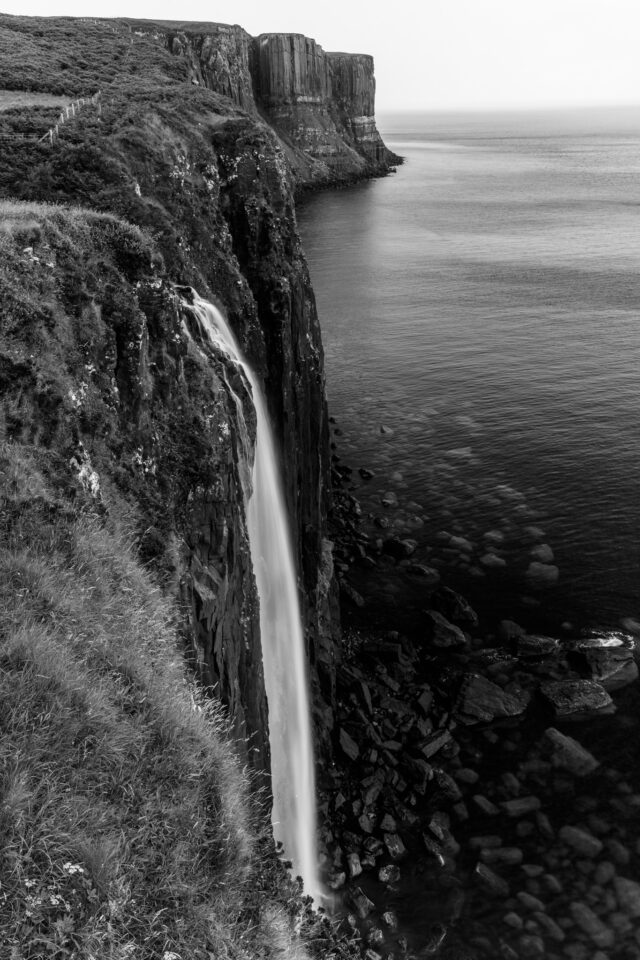
A few minutes from the Old Man, the Mealt Falls car park offers a great view over the waterfall and the Kilt Rock in the distance. As for any easy access viewpoint, you kind of have to queue to get a good spot.

Image 17

Kilt Rock and Mealt Falls
Canon 5DSr, Canon 16-35mm f4L, f14, ISO 50, 0.4 sec, 35mm

But once your turn is up, you are rewarded with a lovely view over the open waters and the coast features

The Way Back

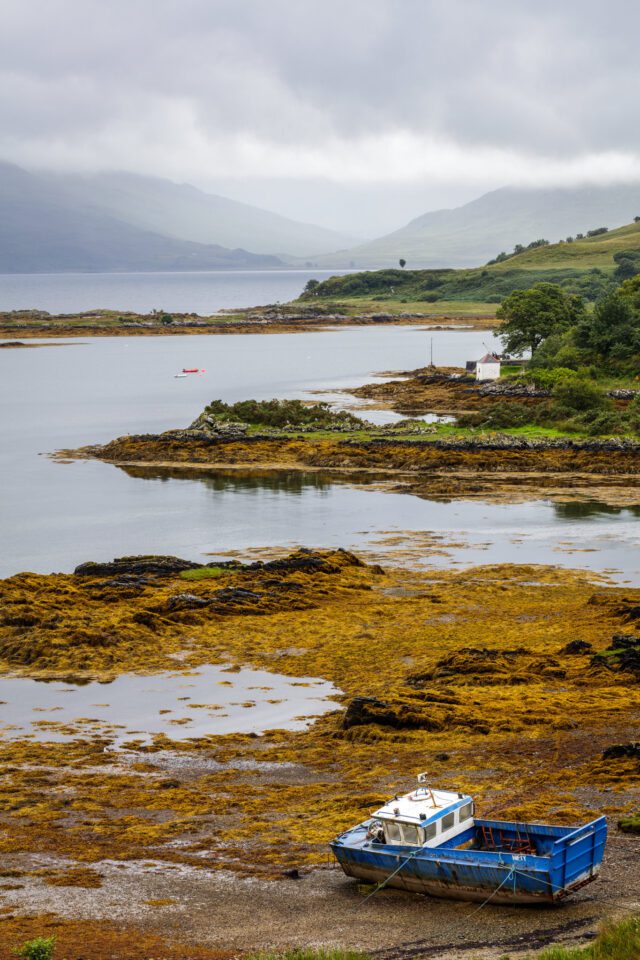
The drive back to Inverness did not bring its share of image opportunity. The bad weather certainly did not help at all. However, just before leaving Skye, I came across this fisherman boat, beached on the side, and decided to make something of it.

Image 18

Beached
Canon 5DSr, Canon 70-200mm f2.8L, f16, ISO 100, 1/13, 110mm

Image 19

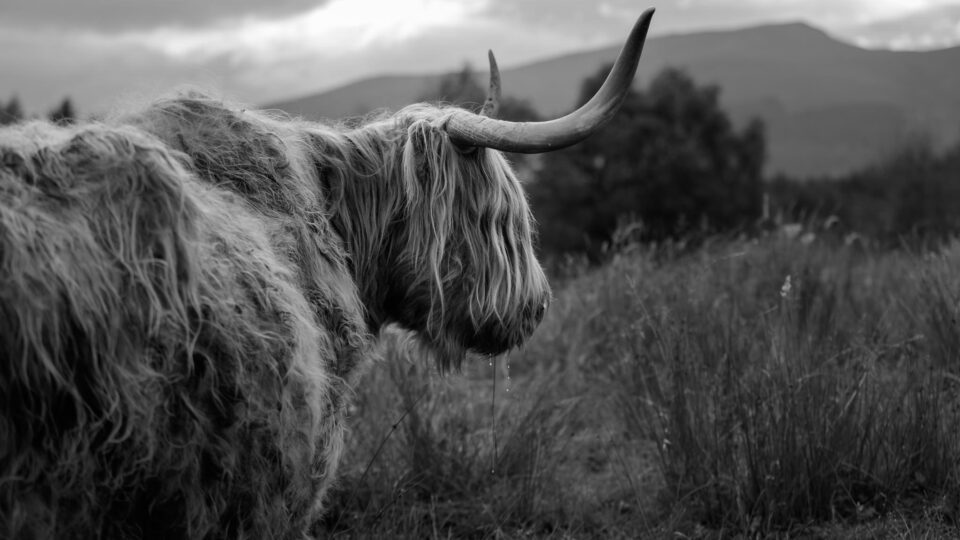
Land of cows
Canon 5DSr, Canon 70-200mm f2.8L, f3.5, ISO 100, 1/400, 70mm

We pitched our tent for the last time on a vacant lot, minutes away from the airport. To our defence, it was not by choice but by lack of options. The closer you get to the city, the more barriers and fences appear, making camping quite challenging.

We flew back to London with tons of images to cull and process, but with a strong desire to come back in winter, in the hope for some midge free, dry and sunny Scottish experience. I would say that my only regret was not to witness a single sunset or sunrise in 8 days. The weather did play to our disadvantage, but that is something you have to live with.

Gear list:

Who I am
My name is Felix Belloin, I am a 24 year old French amateur photographer living in London. I spend most of my days behind a screen in an office, so I try to make the most out of the any trip I plan. I did not learn photography as such; I just dedicated a lot of time to online resources like blogs, articles and Youtube tutorials. The rest comes with practice and exposure to helpful feedback from other photographers. I am really keen to share my experience with others, as I think there is no better resource when planning a trip, than the feedback from others before you. I hope you find this article entertaining and enticing enough to make you want to board a plane to Scotland. Thank you for taking the time to read it anyway, and looking forward to hearing from you.

Best wishes,
Felix Belloin


This guest post was contributed by Felix Belloin. To see more of his work, please check out his 500px and his Facebook pages.

The post A Scottish Espresso appeared first on Photography Life.


from Photography Life https://photographylife.com/a-scottish-espresso