DIY projects are always popular, so we’ve decided to throw another one into the mix. This particular little idea comes from a problem that many photographers have – where do you get a good, small, white/gray surface to use for white balancing your RAW shots in conversion?
The obvious answer here is “just get a grey card!” But…
- Problem number one – a good gray card comes with a price tag from around $20 up to potentially as much as $100. Not to mention that for some shots (like it is in a studio with multiple lights/reflectors) you may need several references for white balance placed in the scene.
- Problem number two – gray cards require delicate handling (no bending, no fingerprints, no dirt, no scratches, some can’t withstand moisture, etc.). What if you dropped your gray card into dirt in the middle of nowhere?
- Problem number three is that you have to actually set up a grey card, and that might be a hard thing to do – uneven surfaces, wind, anything that makes it difficult to put the grey card down or stand it up will make it difficult to use.
We’re proposing an alternative that will save you time and money, as well as make you feel good for not buying into some inefficient, overpriced product of limited usability.
So, welcome to LibRaw’s Wacky Cheap 5-Dollar DIY White Balance Reference Project.
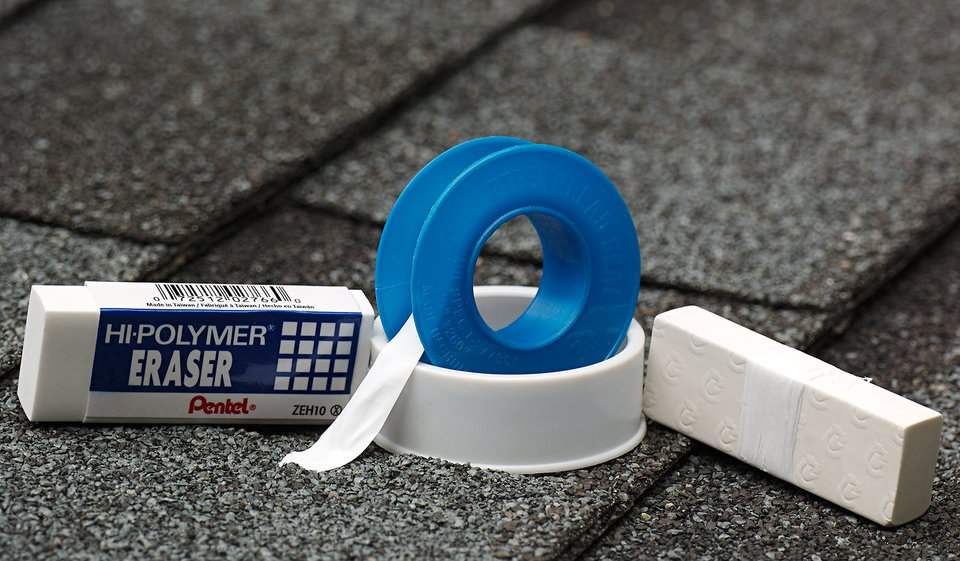
Step 1. Go to whatever store you have nearby that sells office supplies. Get a white/light gray rectangular eraser.
Got it? Good. You’re ready for the next step.
Step 2. Go to any hardware/home improvement store and get a roll of Polytetrafluoroethylene (known most commonly as Teflon/PTFE) white matte thread seal tape. This stuff is indispensable when it comes to plumbing, you can find it everywhere in the world.
Step 3. Tightly wrap the PTFE around the eraser several times – 4-5 times ought to do it, it won’t let through any light after that.
That’s it. Your cheap, portable, easily-replaceable universal white balance reference device is done.
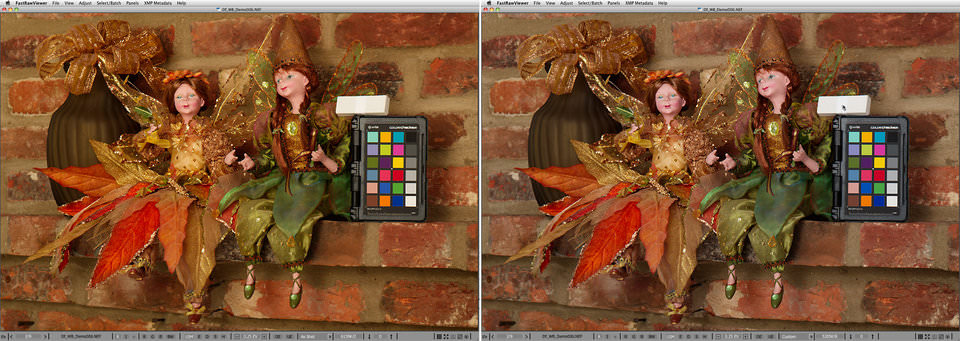
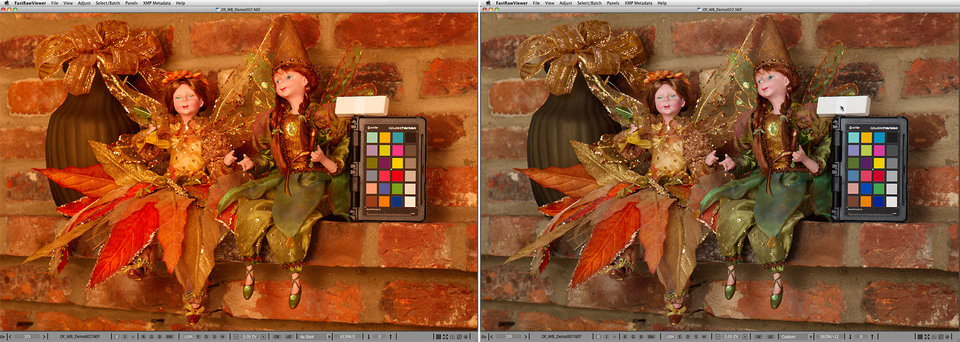
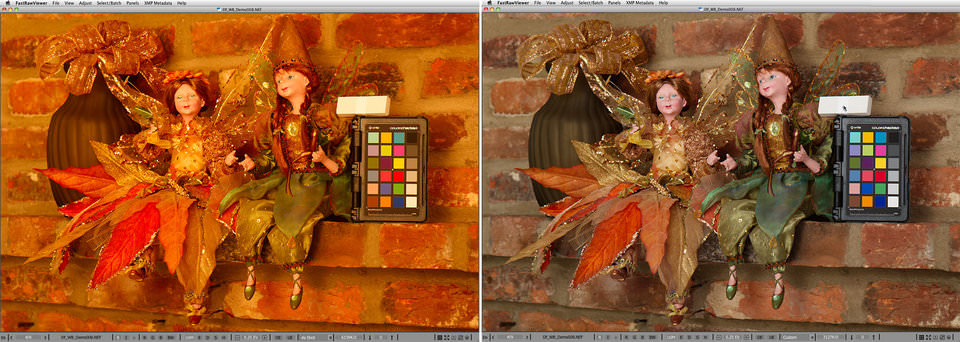
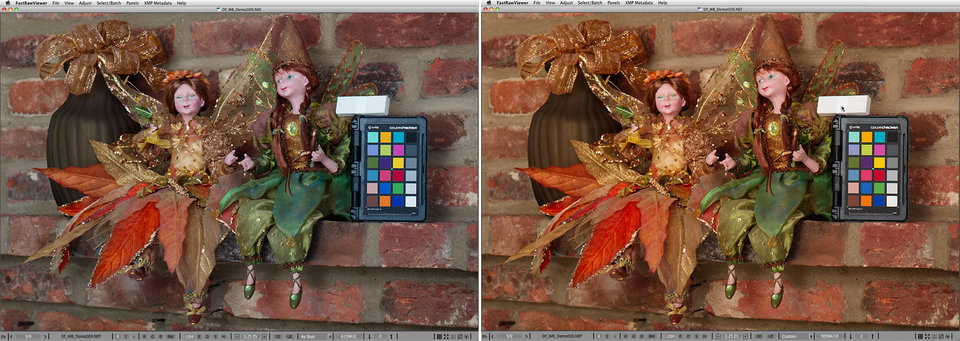
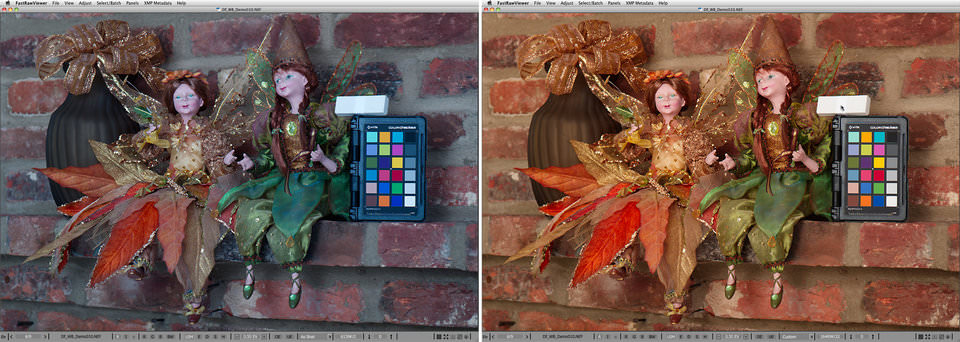
For a demonstration of its use and effectiveness we’ve chosen a scene that will become (after a re-arrangement) a postcard for a friend – autumnal colors, fairy dolls, and our favorite brick wall. Consider 5 shots of the same scene taken under 5 very different color temperatures, ranging from warm incandescent, to very cool high in the mountains. The left part of each picture is the RAW, opened in FastRawViewer with the white balance set to “As Shot.” The right part is the same RAW, with a custom white balance established by clicking on our improvised white balance reference. The mouse cursor shows where exactly the white balance was taken from.
As you can see, the scene contains an X-Rite ColorChecker Passport target. If in doubt, you can install FastRawViewer or use your favorite RAW converter, download the respective RAW files, and check for yourself that the white balance taken from the Passport gray patch is virtually equivalent to what we got from our eraser-Teflon tape setup, as can be seen from the comparing color temperatures, tints, or whatever other white balance readings your software provides.
Incidentally, it’s not by accident that we’re suggesting using this particular material – sintered PTFE has been known to have high spectral purity, low opacity (that’s why 4 layers is enough), and a close-to-1 very diffused reflection factor for many years. However, for obvious reasons, this has not been disseminated as public knowledge.
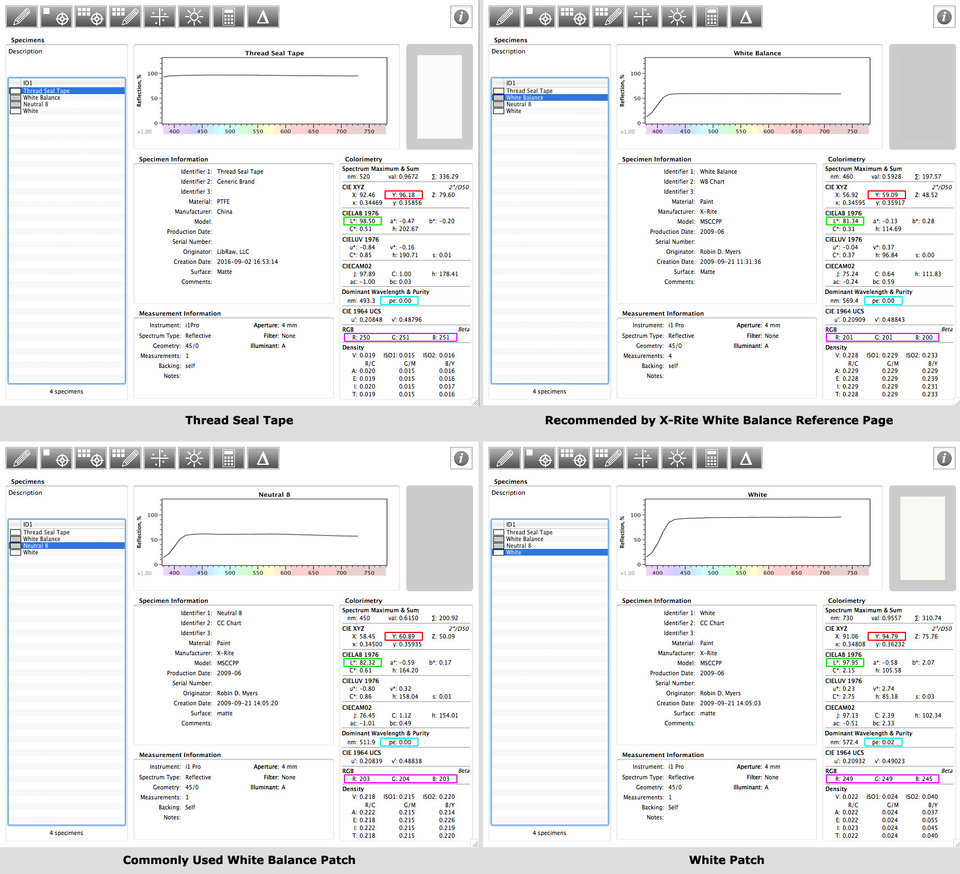
To be pedantic, a little bit of technical information about this. We measured the Teflon tape, after it was already wound around the eraser, with a spectrophotometer. We used Robin D. Myers measurements, made with a same type of the spectrophotometer, for:
- A white balance reference page as recommended by X-Rite
- A commonly-used gray patch
- A white patch
The picture below shows the results of said measurements as processed by SpectraShop.
The most telling features are:
- The spectral graph at the top, which needs to be as flat as possible, that makes for a good neutral reference for white balance;
- Y, the reflectivity of the material (the red rectangular mark), the maximum possible being 100; for 18% gray, Y=18;
- L* (the green rectangular mark); for 18% gray, L*=50;
- pe, spectral purity (the cyan rectangular mark), pe=0 is “ideal”;
- RGB values (the purple rectangular mark), demonstrating the neutrality in familiar units.
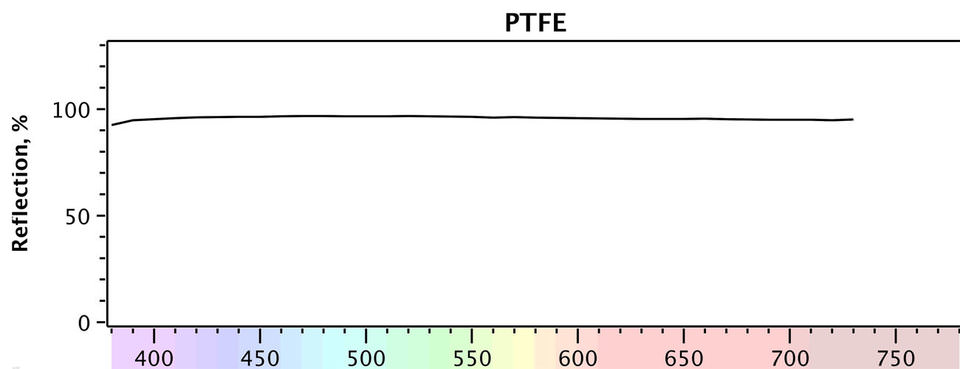
As you can see, our Teflon tape has a reflectivity factor of Y=96.18%, that is the highest of all materials checked, L* = 98.5, a spectral purity equal to 0, and RGB values almost identical to one another (250, 251, 251). As you can see on the graph below, the spectral response of our DIY target is extremely flat.
Aside from its cheapness and ease of use, Teflon tape has two more very important qualities:
- In most cases, the only things that are going to be brighter than the Teflon tape are a specular highlight or a light source, because the Teflon tape has a close-to-maximum achievable diffuse reflection. This helps when establishing exposure and maximum brightness in RAW conversion.
- The higher the values in the digital capture are, the lower the noise is. That’s why having a target with a higher diffuse reflection factor as a white balance reference ensures that the readings used by the click-on-neutral method are less contaminated by noise, less skewed, and generally more accurate.
Links to the RAW files:
Df_WB_Demo006.NEF
Df_WB_Demo007.NEF
Df_WB_Demo008.NEF
Df_WB_Demo009.NEF
Df_WB_Demo010.NEF
The post DIY: Reliable and Cheap Universal White Balance Reference Device appeared first on Photography Life.
from Photography Life https://photographylife.com/diy-reliable-and-cheap-universal-white-balance-reference-device
No comments:
Post a Comment